


In this article, you'll learn how to export data from the Google BigQuery API with Python. Specifically, we'll download a CSV of our data from Google Cloud Storage, without cloud storage, and with a reverse ETL tool.
So you want to extract data from Google BigQuery. Maybe you’re working on data migration to another warehouse like Amazon Redshift, or maybe you want to clean and query your data after transformation.
Either way, I got you. BigQuery is a great tool whether you’re looking to build an ETL pipeline or combine multiple data sets, or even transform the data and move it into another warehouse.
In this tutorial, I’ll break down how to create a Google Cloud service account, create a bucket in cloud storage, select your dataset to query data, create a new project, extract and export your dataset, and download a CSV file of that data from Google Cloud Storage. I’ll also cover a couple of alternative export methods in case this isn’t your jam.
Before we get too far into things, you'll need the following:
- A Google Cloud Account.
- Familiarity with Google BigQuery. If you’re new to BigQuery, check out this documentation.
- Familiarity with Python.
- Google BigQuery API. For details see the related documentation.
OK, let’s get cooking with Google BigQuery.
1. Create a Google Cloud service account
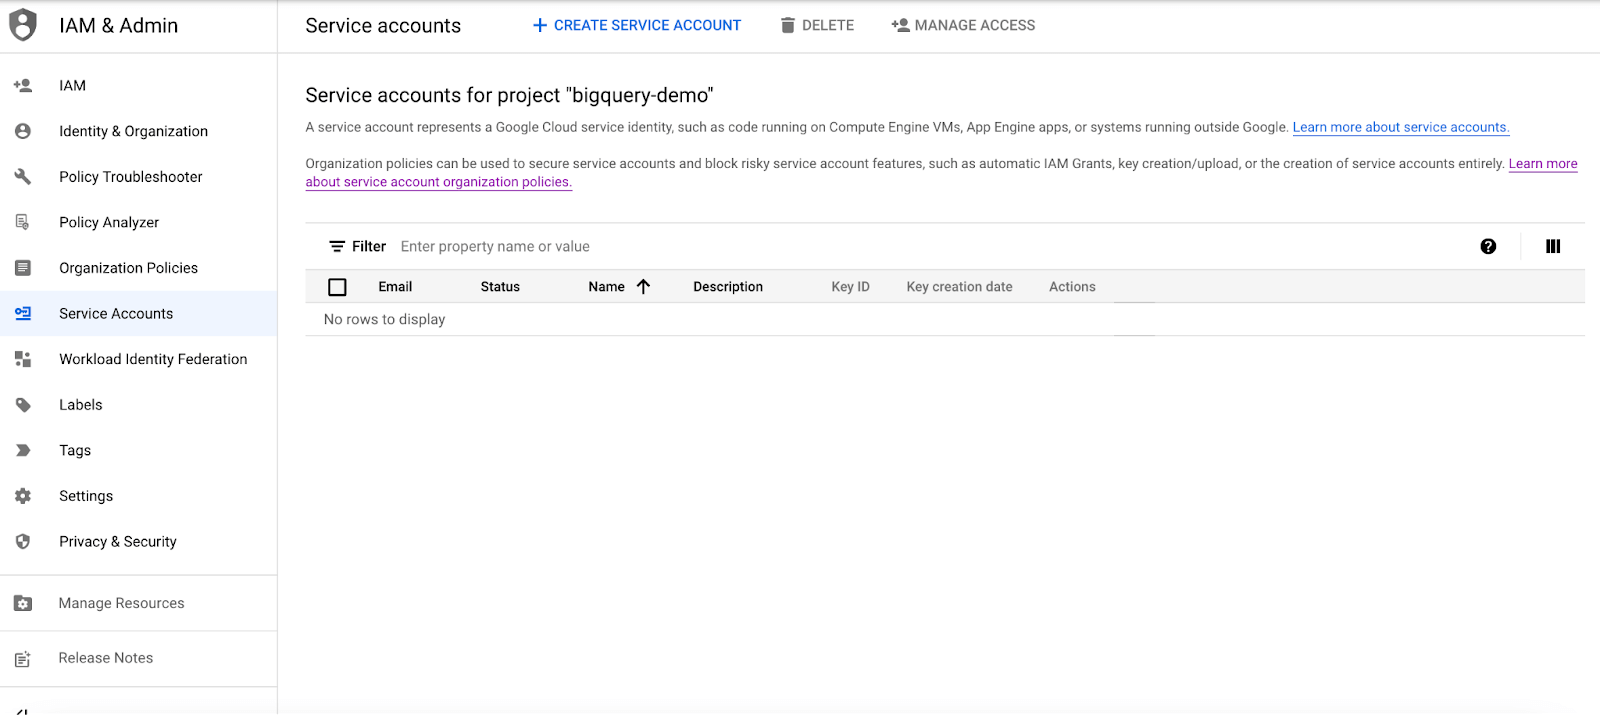
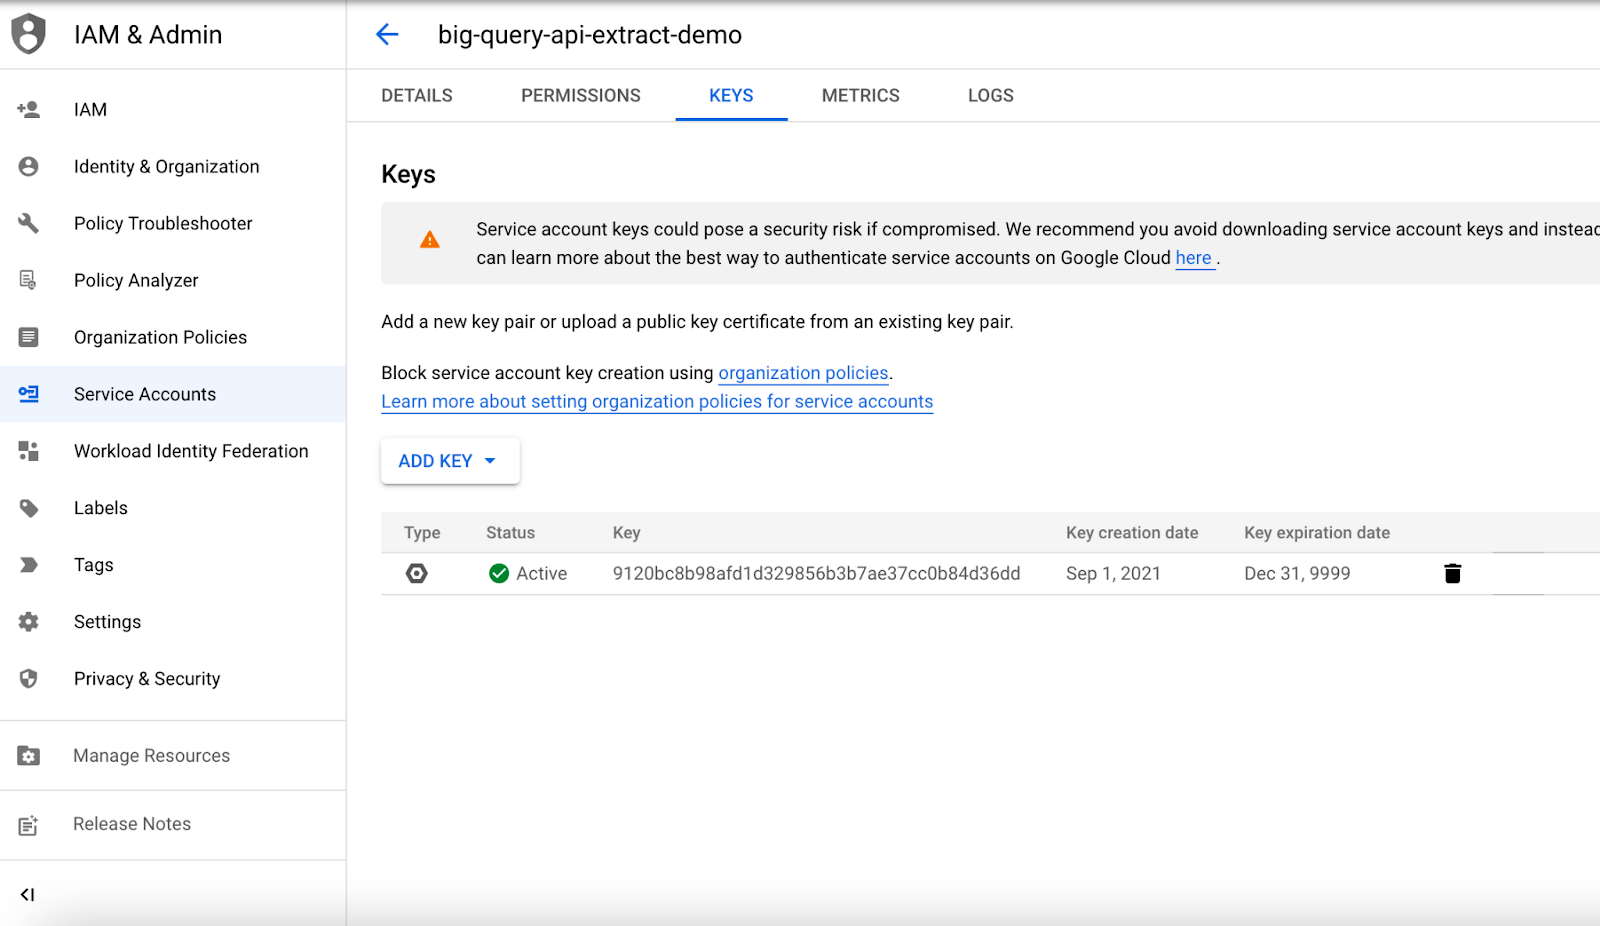
To start out, you’ll need to create a Google Cloud service account if you don’t already have one. Head on over to the Google Cloud console, go to IAM & Admin, and select service accounts.
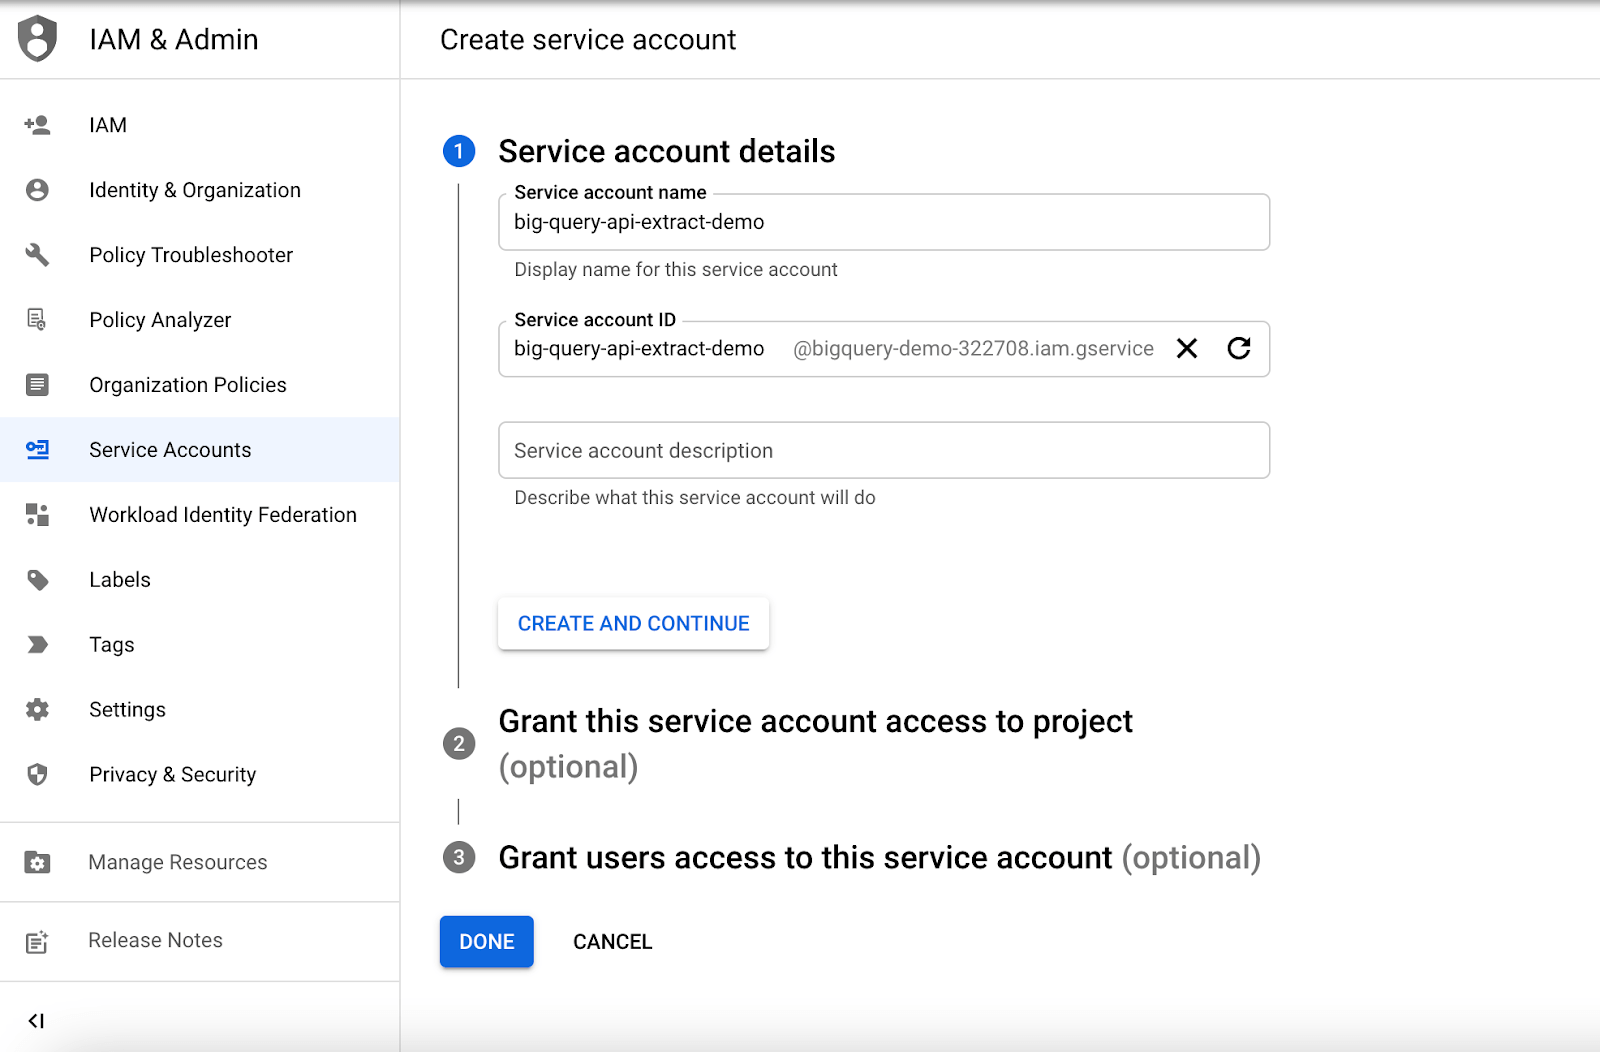
From here, you’ll want to choose “create service account” and fill in the service name and account with “big-query-api-extract-demo” (or a more apt name for your export if you want something more descriptive).
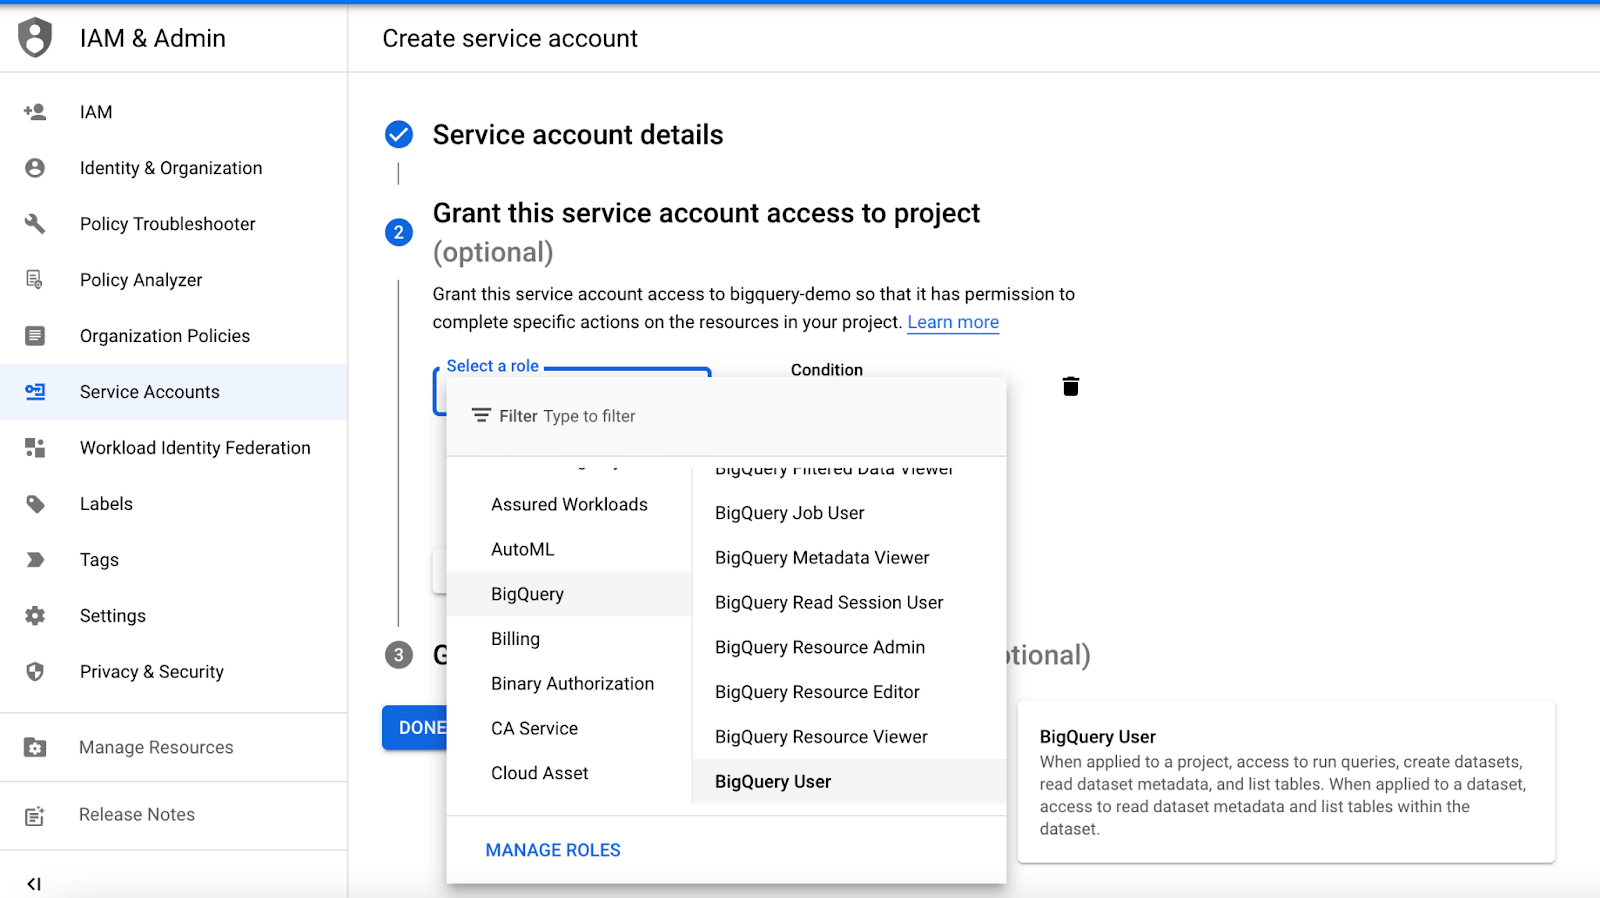
To make sure we have access to create a project in BigQuery, we’re going to select what roles and permissions we’ll allow. Select both the “BigQuery User” and “Owner” roles. These roles will allow you to create, run, and list datasets and run queries on your dataset. Click “done” and you should see your newly created service account.
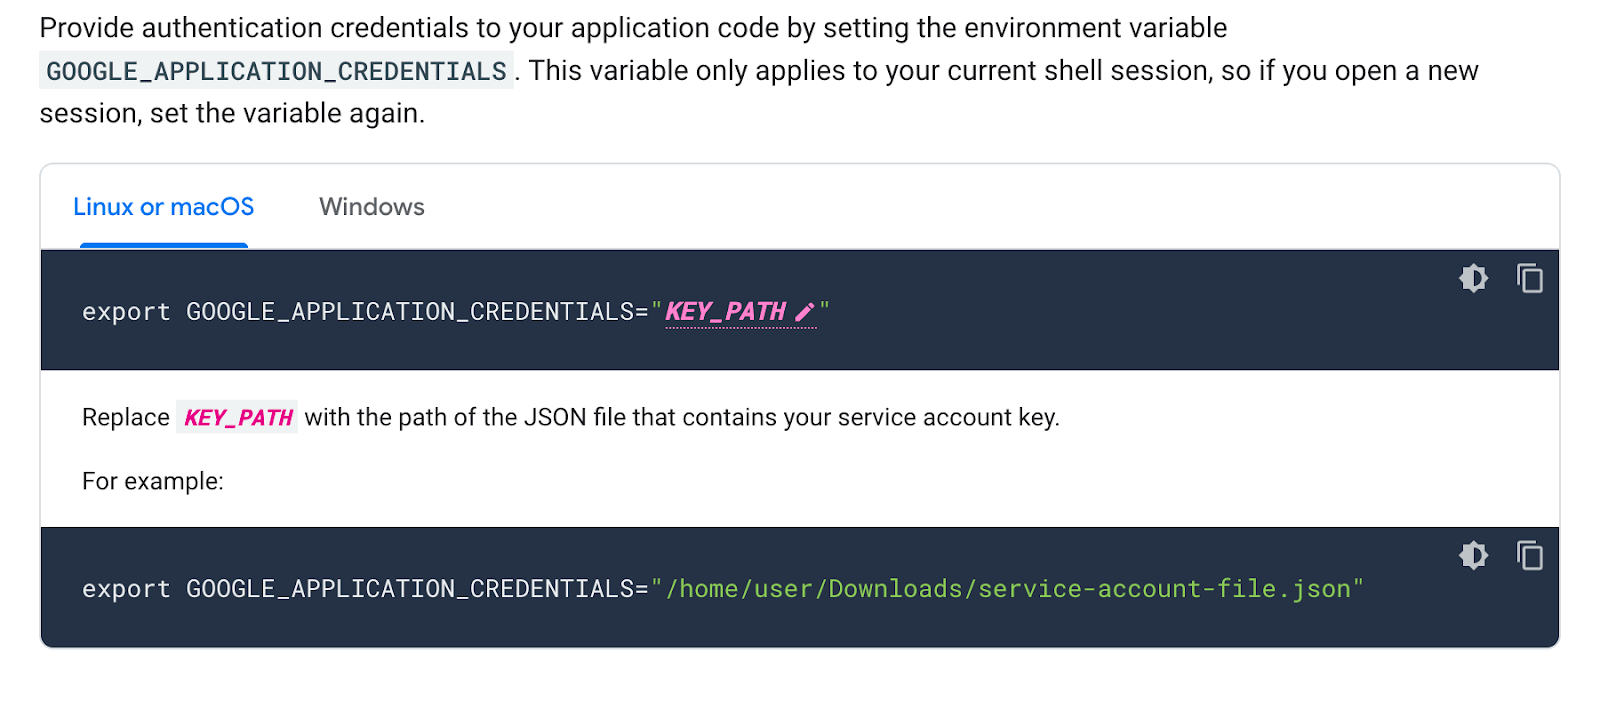
Next, we’ll need to create credentials to access the Google BigQuery API. Go to actions → manage keys → add a key → create a new key. You’ll create a JSON type key and then save the key somewhere safe over your computer. Add it to your local machine’s environment variables for safety measurements.
Here’s a summary of what we’ve done so far. Before we move on, make sure you’ve done all of the following:
✅ Create a Google service account
✅ Select the needed roles and permissions (BigQuery User and Owner)
✅ Create credentials to access the Google BigQuery API (and save to your local storage)
2. Create a bucket in Google Cloud Storage
Time to create a bucket in Google Cloud Storage. You’ll need to go back to the Google Cloud Platform home page and select “cloud storage.”
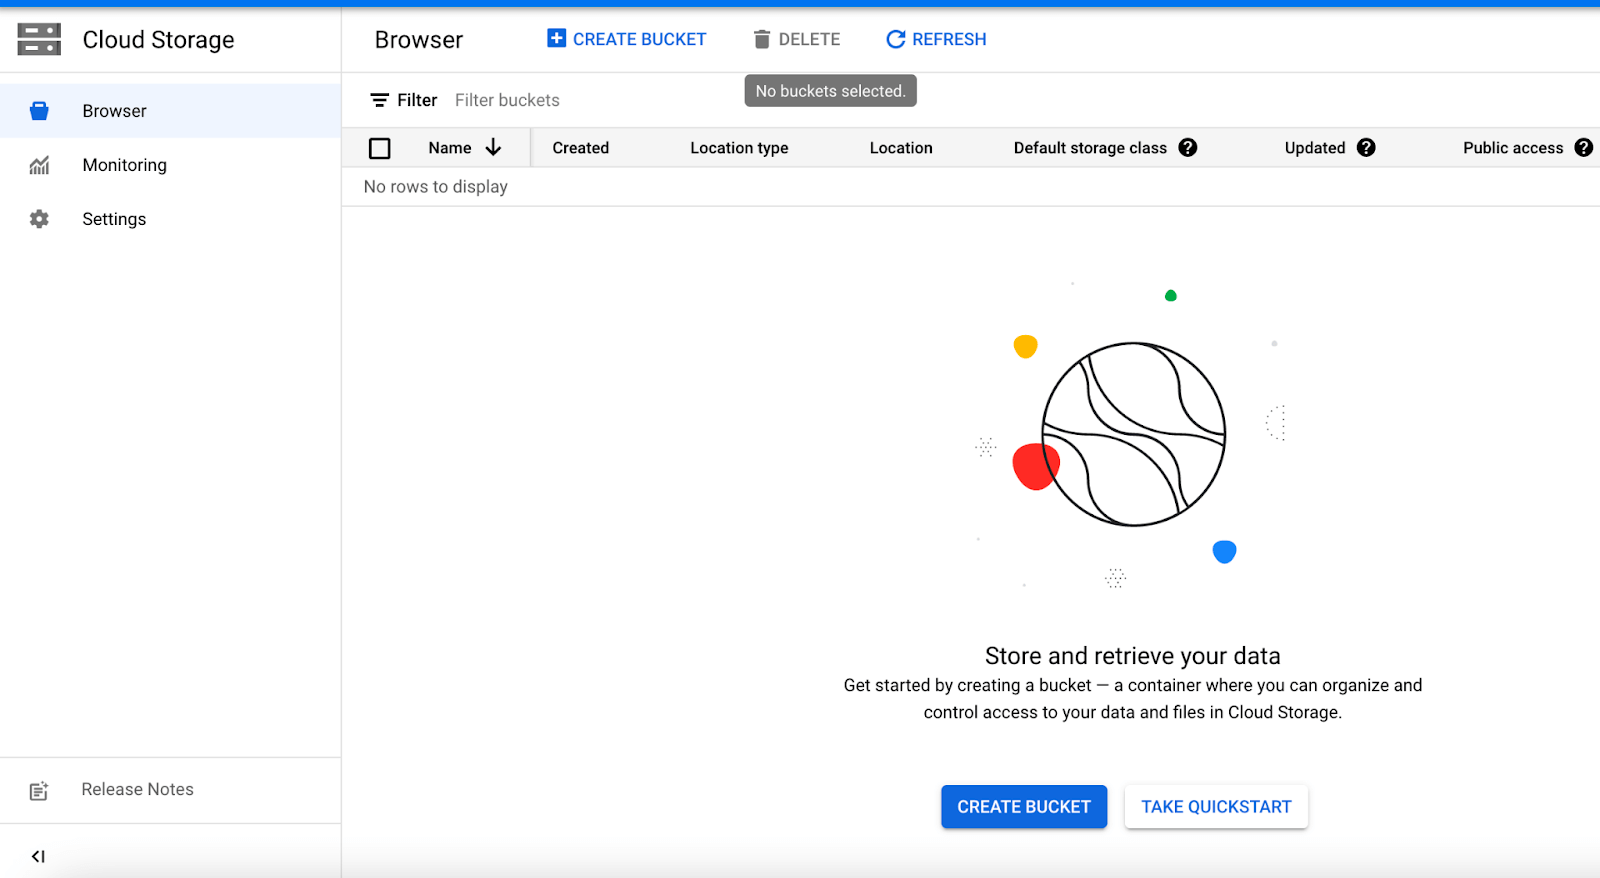
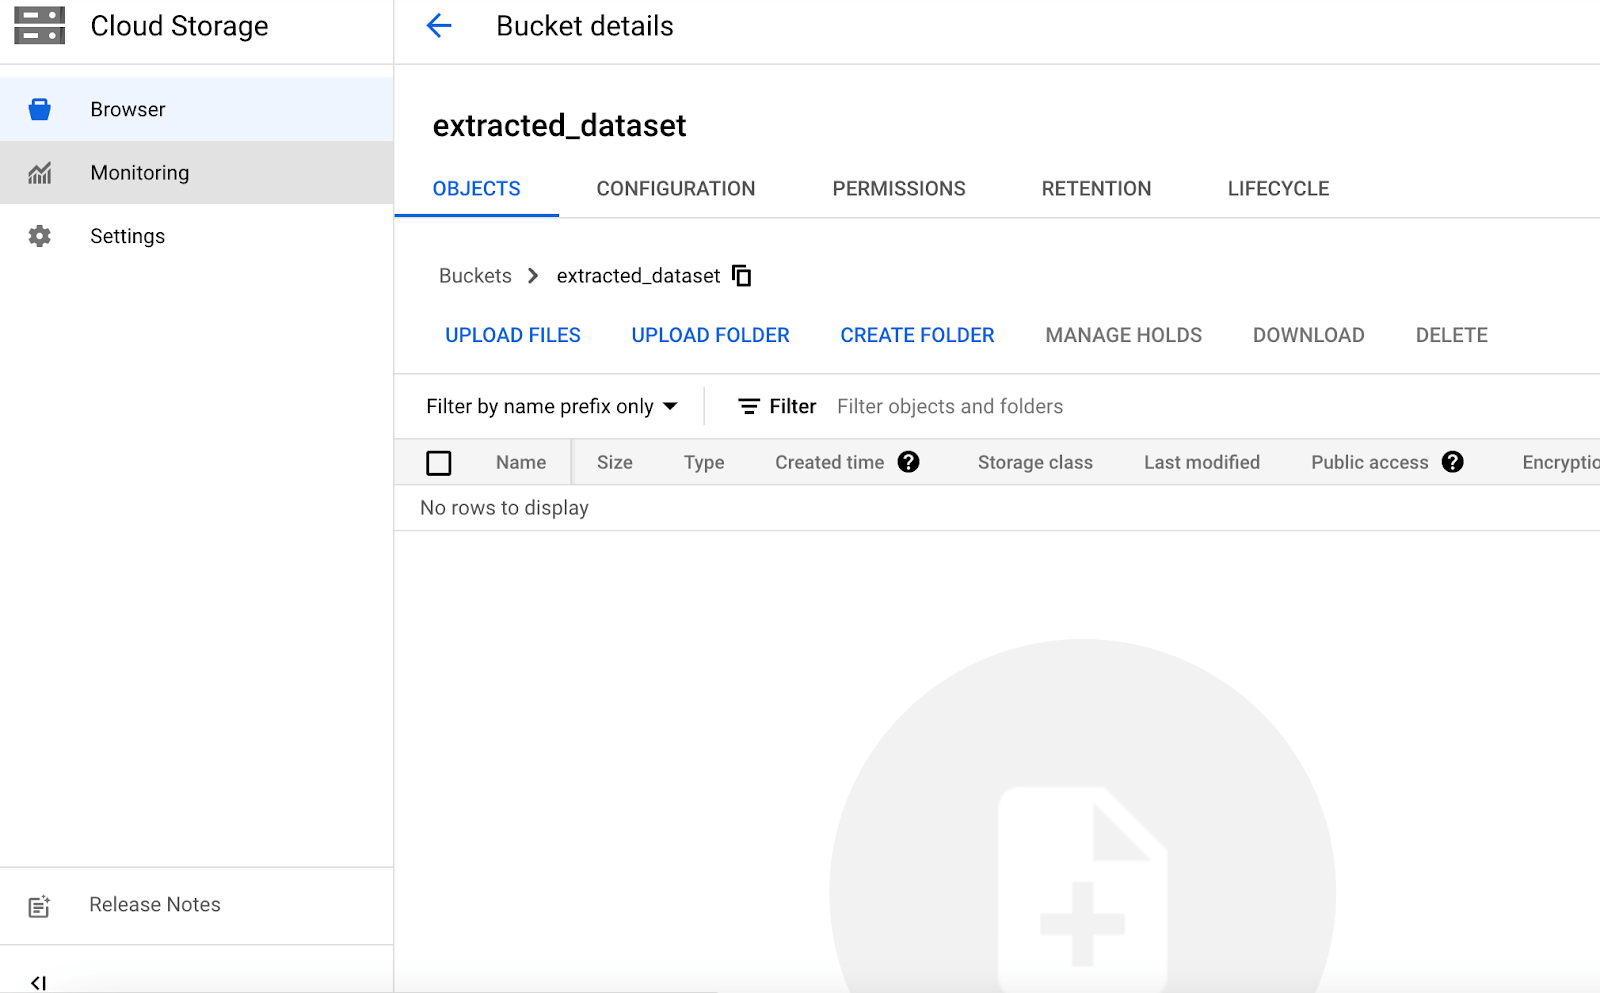
From here, you can click “create new bucket” and give your bucket a name (I’m using “extracted_dataset” for this example.) You’ll want to keep all default settings, which includes storing your dataset as a CSV file we’ll download later on in this tutorial.
Here’s a summary of what we’ve done so far in this step:
✅ Create a Google service account
✅ Select the needed roles and permissions (BigQuery User and Owner)
✅ Create credentials to access the Google BigQuery API (and save to your local storage)
✅ Create a bucket in Google Cloud Storage
✅ Name the bucket and ensure default settings are set so you’ll have a CSV to download later
3. Select a BigQuery public dataset to query data
If you’re querying your own data, you can skip this step. If you do need a dataset to practice on, however, we can select a dataset to use and query from BigQuery’s public dataset list.
You can find these public datasets by going back to the home page, clicking on the BigQuery platform, selecting “add data” and browsing public datasets. To follow along exactly, pick HackerNews and view the data set. There will be a new project formed with the name “bigquery-public-data."
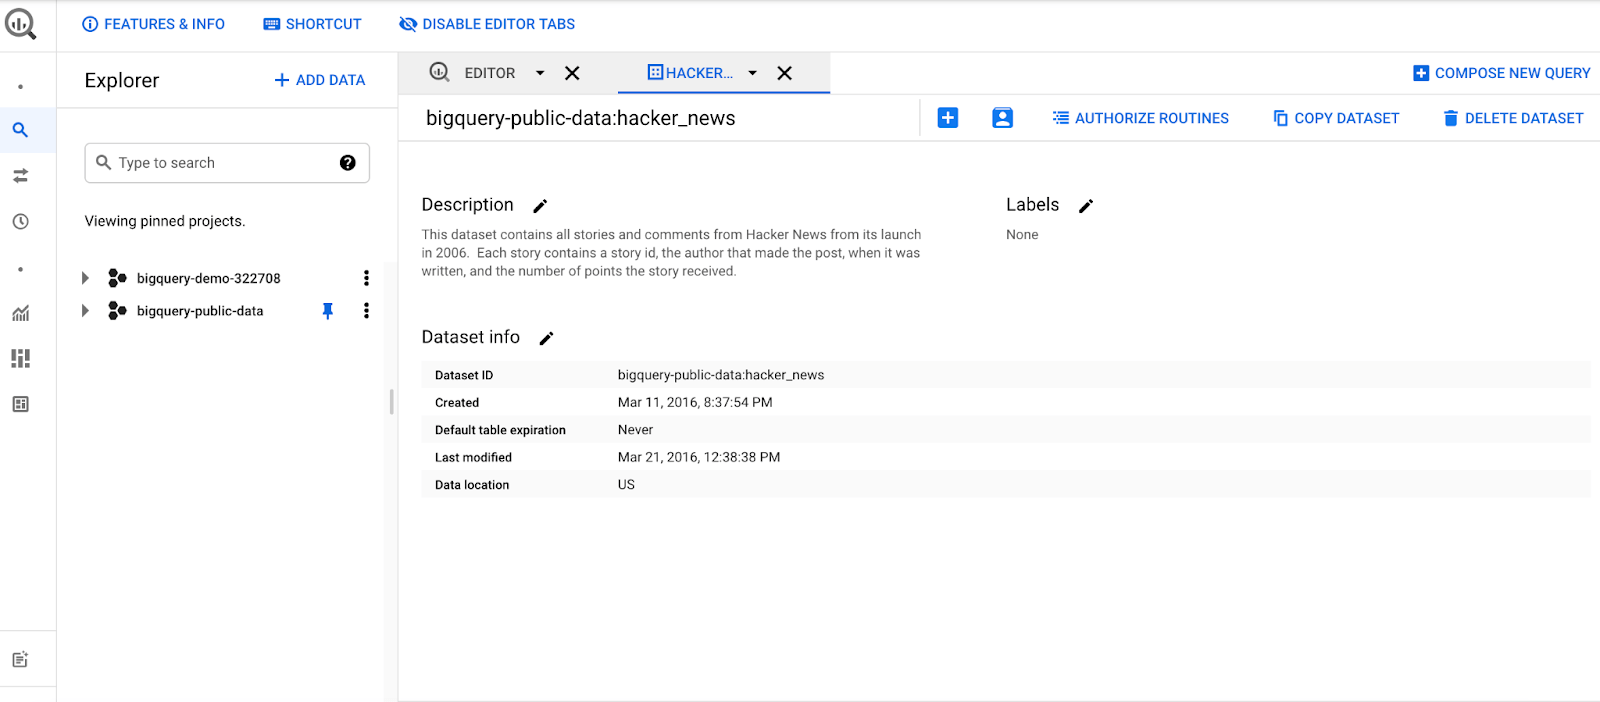
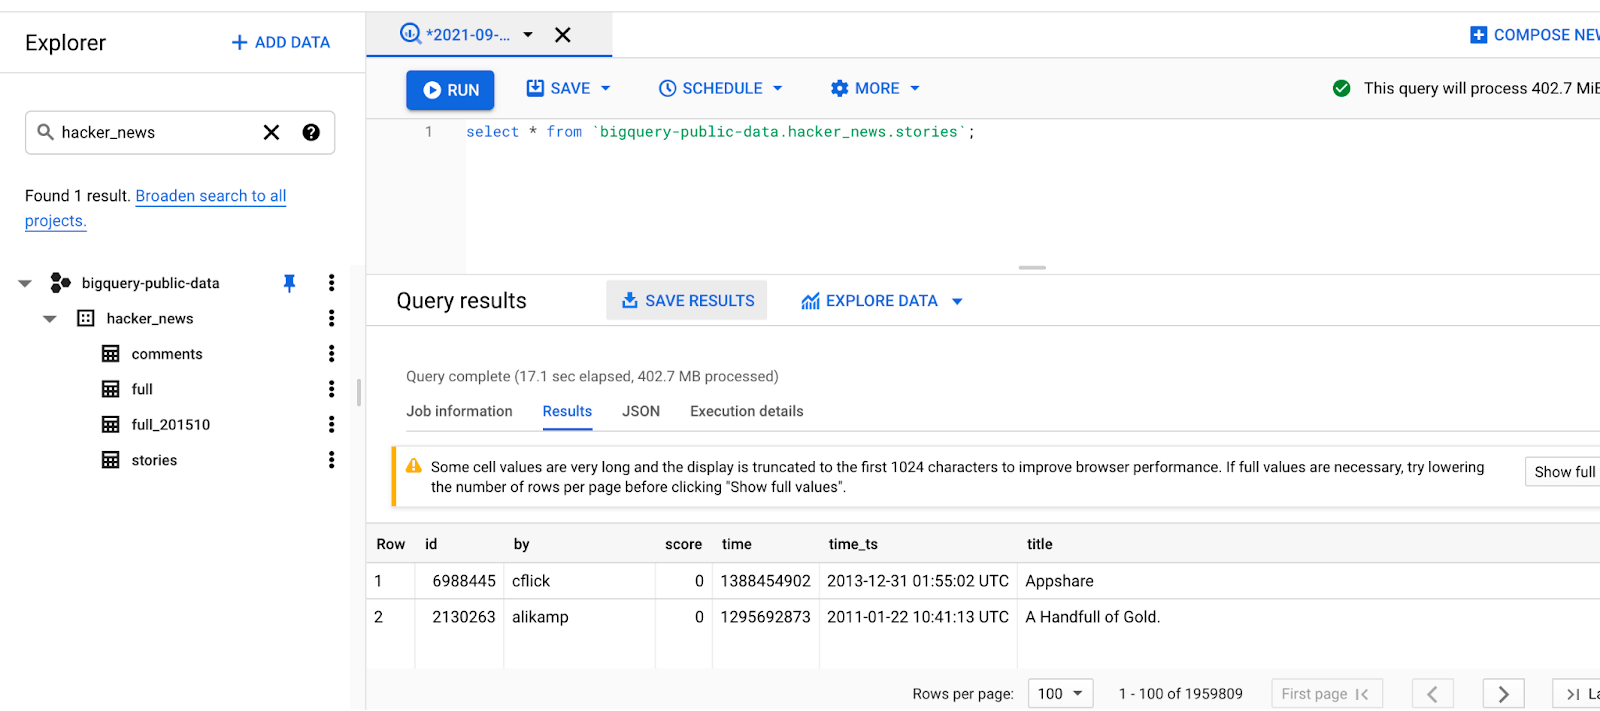
Search for “hacker_news” and select the “stories” table. Open up the SQL editor and run the following query:
SELECT * FROM bigquery-public-data.hacker_news.stories.You’ll see a table of rows and columns of all the stories from the HackerNews dataset:
Here’s a summary of what we’ve by the end of this step:
✅ Create a Google service account
✅ Select the needed roles and permissions (BigQuery User and Owner)
✅ Create credentials to access the Google BigQuery API (and save to your local storage)
✅ Create a bucket in Google Cloud Storage
✅ Name the bucket and ensure default settings are set so you’ll have a CSV to download later
✅ (Optional) Browse public BigQuery datasets and choose HackerNews to create a new project with that data
4. Create a new project in the code editor
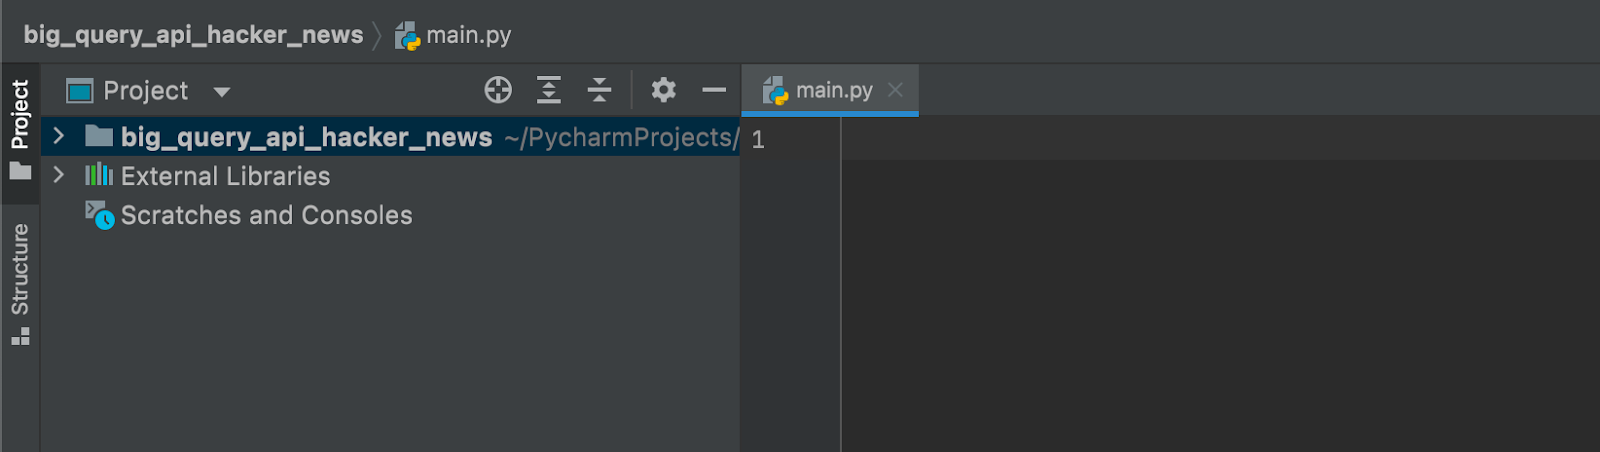
Next, we’ll create a new project in our code editor and name the project appropriately. I went with “big_query_api_hacker_news”, but you can follow your heart’s desire here.
Next, install the Google Cloud API client library with and import the BigQuery client library from Google Cloud with the following code:
pip install --upgrade google-cloud-bigquery
import os
from google.cloud import bigquery
The service account JSON below is the API credentials that will allow access to all the services Google Cloud provides. As mentioned earlier in the tutorial, the service account role was set to BigQuery access only.

To connect the Python BigQuery client to the public dataset, the “stories” table within our “hacker_news” dataset, we’ll need to set multiple variables first:
- bucket_name: name of the cloud storage bucket
- project: name of the specific project working on in BigQuery
- dataset_id: dataset name
- table_id: table name
[
import os
From google.cloud import bigquery
SERVICE_ACCOUNT_JSON = os.environ[‘GOOGLE_APPLICATION_CREDENTIALS’]
client = bigquery.Client.from_service_account_json(SERVICE_ACCOUNT_JSON)
bucket_name = ‘extracted_dataset’
project =  “bigquery-public-data”
Dataset_id = “hacker_news”
Table_id = “stories”
]
Here’s a summary of what we’ve by the end of this step:
✅ Create a Google service account
✅ Select the needed roles and permissions (BigQuery User and Owner)
✅ Create credentials to access the Google BigQuery API (and save to your local storage)
✅ Create a bucket in Google Cloud Storage
✅ Name the bucket and ensure default settings are set so you’ll have a CSV to download later
✅ (Optional) Browse public BigQuery datasets and choose HackerNews to create a new project with that data
✅ Create a new project in our code editor
✅ Install the Google Cloud API client library
✅ Import the BigQuery client library from Google Cloud
✅ Set variables for our dataset
5. Extract and export our dataset
Now it’s time to extract and export our sample (or real, in your case) dataset.
To export data from BigQuery, the Google BigQuery API uses extract_table, which we’ll use here (you can find more info about this method in the docs). The extract_table method takes three parameters:
- table_ref
- destination_uri
- location
Table_ref (more info in docs here) references the dataset set table, in this case, hacker_news.stories. Destination_uri (docs can be found here) is the cloud storage URL where the bucket is stored. The path for the destination URI would be gs://bucket_name/filename.csv. You can name the file name whatever you want, but in our example instance it’s extracted_stores_data.csv and our bucket name is extracted_dataset. The full URI is:
gs://extracted_dataset/extracted_stories_data.csvThe run location must match the destination and source table location, which would be US in our case.
[destination_uri = “gs://{}/{}”.format(bucket_name, “extracted_stories_data.csv”)
dataset_ref = bigquery.DatasetReference(project,dataset_id)
table_ref = dataset_ref.table(table_id)
Extract_job = client.extract_table(
	table_ref,
	destination_uri,
	location=”US”
)
extract_job.result()
]
When we run the extract_table function, we’ll successfully pull the data from hacker_news.stories from BigQuery to Google Storage. To make it easier to keep track of the extraction job, create a logging message to notify you when the job is complete with the following code.
[timestamp = datetime.datetime.now()
print(“{}: Exported {}:{}.{} to {}”).format(timestamp, project, dataset_id,table_id, destination_uri)
]
If everything went to plan, the output should be:
2021-09-01 09:13:24.760567: Exported bigquery-public-data:hacker_news.stories to gs://extracted_dataset/extracted_stories_data.csvHere’s a summary of what we’ve by the end of this step:
✅ Create a Google service account
✅ Select the needed roles and permissions (BigQuery User and Owner)
✅ Create credentials to access the Google BigQuery API (and save to your local storage)
✅ Create a bucket in Google Cloud Storage
✅ Name the bucket and ensure default settings are set so you’ll have a CSV to download later
✅ (Optional) Browse public BigQuery datasets and choose HackerNews to create a new project with that data
✅ Create a new project in our code editor
✅ Install the Google Cloud API client library
✅ Import the BigQuery client library from Google Cloud
✅ Set variables for our dataset
✅ Export data from BigQuery using extract_table
6. Download our CSV file from Google Cloud Storage
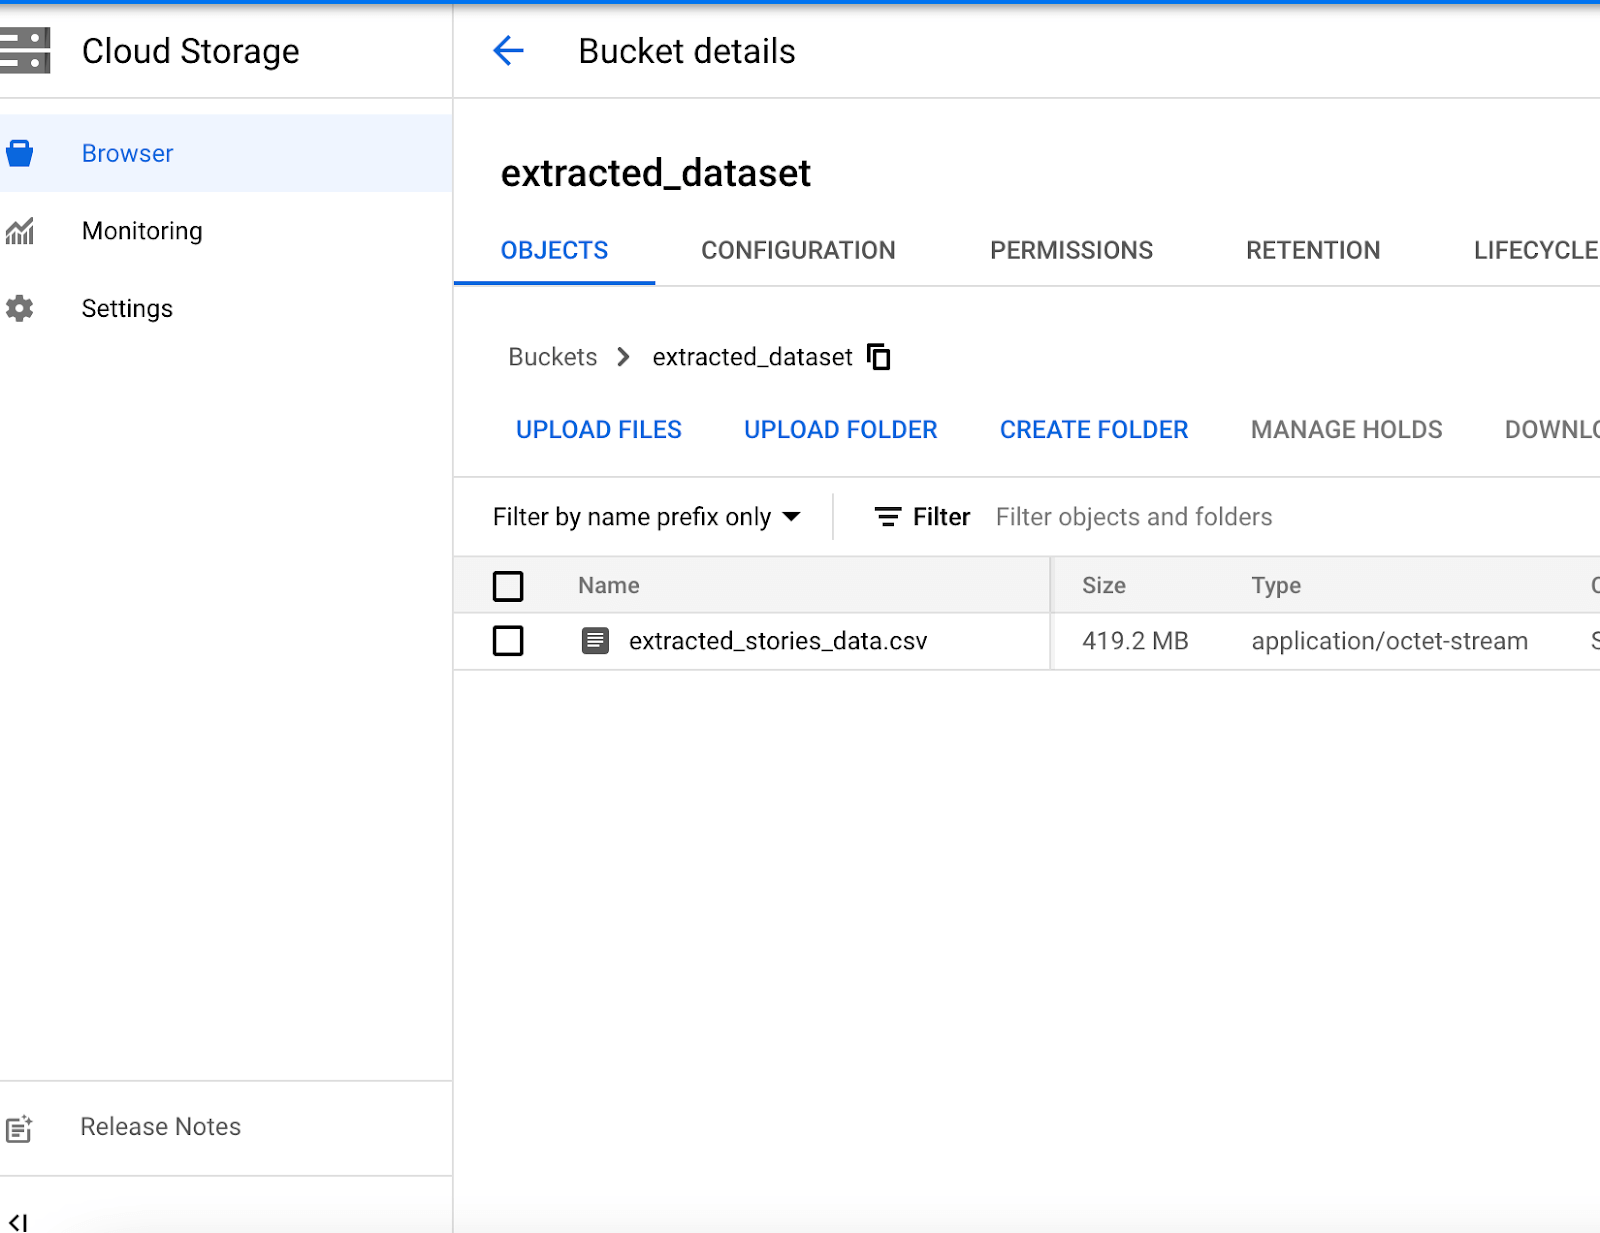
Now the part you (and whoever put in this request) have been waiting for: Time to download our CSV file from Google Cloud Storage.
Go back to Google Cloud Storage and you’ll see a file called extracted_stories_data.csv (if you’ve been following my naming conventions for our example). You’ll be able to download this CSV to your local machine and open it in Excel. 🙌
Yay, we did it! Here’s a quick summary of all the steps you worked through in this tutorial:
✅ Create a Google service account
✅ Select the needed roles and permissions (BigQuery User and Owner)
✅ Create credentials to access the Google BigQuery API (and save to your local storage)
✅ Create a bucket in Google Cloud Storage
✅ Name the bucket and ensure default settings are set so you’ll have a CSV to download later
✅ (Optional) Browse public BigQuery datasets and choose HackerNews to create a new project with that data
✅ Create a new project in our code editor
✅ Install the Google Cloud API client library
✅ Import the BigQuery client library from Google Cloud
✅ Set variables for our dataset
✅ Export data from BigQuery using extract_table
✅ Download the CSV from Google Cloud Storage to your local machine
Alternative #1: Use BigQuery to write directly to a user-generated CSV without cloud storage
If you already have a target CSV that you’d like your transformed data to live in, the steps above can feel a bit out of the way. Thankfully, you can have BigQuery write your data directly to your CSV file, without using cloud storage.
To do so, you’ll need the following:
- pyarrow: The python sdk for arrow library so we can process data faster
- pandas: A popular library you’ve probably already used for data manipulation and analysis
- Google Cloud credentials: The same credentials we used for our service account above.
For this method, we’ll first want to create our CSV file (skips this if you already have a CSV you’d like to write your data to). For our example, I’ve named this “extracted_data.csv.”
Then, create a function to extract data from BigQuery to CSV with the following code:
[
from google.cloud import bigquery
import os

SERVICE_ACCOUNT_JSON = os.environ[‘GOOGLE_APPLICATION_CREDENTIALS’]
client = bigquery.Client.from_sevice_account.json(SERVICE_ACCOUNT_JSON)

def big_query_to_csv():
	query = “””
		SELECT  * FROM bigquery-public-data.hacker_news.stories LIMIT 100;
 “””
df = client.query(query).to_dataframe()
df.to_csv(‘extracted_data.csv, index=False,header=True)
print(‘csv file generated’)

big_query_to_csv()
]
This method is much faster than our first workflow, but here’s a summary if you missed the steps (I know, they went by pretty quick):
✅ Create or identify the target CSV we want to write to
✅ Create a function to extract data from BigQuery to CSV
Alternative #2: Use a reverse ETL tool to quickly move your data from BigQuery to your CSV (and beyond)
Both of the methods above work well if you just need to quickly pull a couple of datasets for analysis or reference. However, if you have a lot of data, either workflow may take hours, depending on how much data you need to extract (and how often you need to regularly export it).
If your company has thousands of lines of data and hundreds of datasets, this time will add up quickly.
Thankfully, there’s a better (and faster and easier) way: Reverse ETL. Reverse ETL acts as the bridge between your warehouse (BigQuery) and operational destinations, including (but not limited to) CSVs. Reverse ETL tools like Census take out the API wrestling work and let you easily move data from A to B with the click of a sync button.
Speaking specifically to Census, as the pioneer of reverse ETL, we have a ton of experience saving anyone working with data sanity and time. Our tool works with more than 40 integrations (and counting), and our team includes some of the best data experts in the industry.
If you’re curious and want to try out reverse ETL, you can grab a demo here. Or, if you’d rather stick with the manual method for a bit longer, you can check out our library of resources here for more tutorials like this one.