


There are plenty of reasons to love Snowflake and Slack. Just ask anyone who works in data. TL;DR: They’re great products filled with plenty of features and a painless interface, helping you streamlining your workflows (which is even more motivation to get the most out of them).
In this article, we're upgrading your Snowflake and Slack game by showing you how to sync your data from Snowflake to Slack. So, after reading this article, you'll love them even more. 🫶
You'll learn three different ways to get the job done: One using Census, one manual method, and, of course, one using the Snowflake and Slack APIs. Using Census works best if you frequently need to sync the same data and want to automate the job without actually going through the hassle that normally comes with automating the job.
Using the APIs instead can be a viable alternative, but it is a bit like reinventing the wheel, as you’ll have to start (nearly) from scratch. But, hey, if that’s what you love – we won’t judge. 🤷 If you only need to sync your data occasionally, or if something about the process is different every time and you can’t automate it, the manual method is your best bet.
Syncing from Snowflake to Slack with Census
If you haven’t already, start by setting up Snowflake and Slack connections in Census. From the Connections screen, click the Add Data Source button and choose Snowflake from the list. Check out this 42 second video to walk you through setting up the connection:
Next, connect Slack by clicking the Add Service button in the Connections tab and selecting Slack. Make sure you select the correct Slack workspace before clicking the Allow button.
With the connections in place, you can create a model in the Models tab. Click the Create a Model button and write a Snowflake SQL query to get you the data that you need. Don’t worry – it doesn’t have to be complicated. In our case, it’s as simple as the query below.
SELECT *
FROM SNOWFLAKE_SAMPLE_DATA.TPCH_SF1000.ORDERS
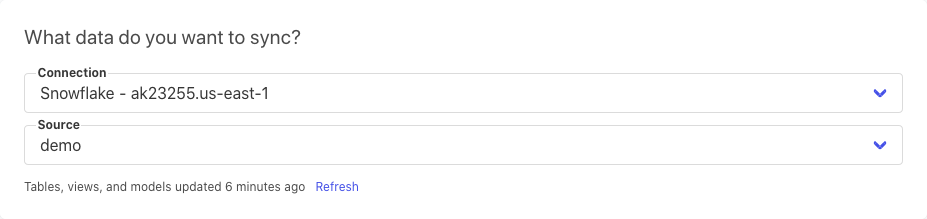
WHERE O_ORDERDATE = current_date() - 1;Now that you’ve written your query, you can set up a sync. Click the big Add Sync button (we promise, you really can’t miss it). From the first set of fields, choose the model that you just created.
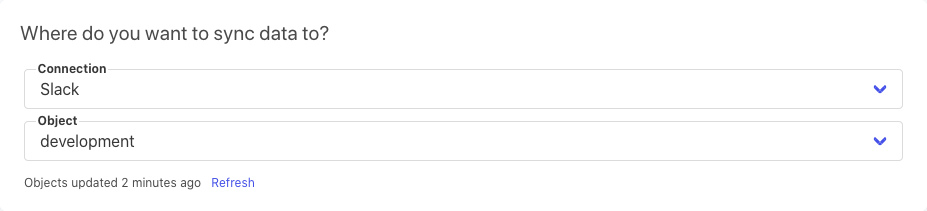
From the second set of fields, choose where to send the data to. In our case, it’s the channel called #development.
After this, four more boxes with options will now appear. In the first box you’ll want to update the destination — in our case the channel #development — by appending to it. In the second, you’ll be prompted to choose a column that contains a unique identifier for your dataset. The third box allows you to specify whether you want to select specific properties (i.e. columns) to sync to Slack or whether you want to sync them all. For our purpose, we’ll go with all. Finally, choose whether you want to sync all records currently in the database, or just the ones which are added after you complete the configuration. We’ll be opting for the latter in this tutorial.
Before clicking Next, we recommend running a test. You can never be too sure, right? If everything is configured properly, the test will send a single Snowflake record to your chosen Slack channel.
Check your record out, make sure everything looks like it should, then click Next. Now, you’ll end up on an overview screen. One final action you’ll want to take is to change the schedule from Manual to something more frequent.
With that, your sync is now fully set up. 🙌 Compared to automating this process using the Snowflake and Slack APIs, like you’ll see in the next section, this method is a breeze. 🍃
💡 Want some more info? Check out the Census Snowflake docs and Census Slack docs for more details on configuring credentials for Census use and why those permissions are needed.
Manually syncing data from Snowflake to Slack
Since Slack is a communication tool and we’ll be sending the data as an attachment, it will accept whatever file you give it – no questions asked – as long as you stay within your plan's storage limits. This means that we can go straight to the Snowflake web UI to export data. Inside the web UI, construct a query that will get you the data that you need. For our example, we're exporting all of yesterday's orders.
SELECT *
FROM SNOWFLAKE_SAMPLE_DATA.TPCH_SF1000.ORDERS
WHERE O_ORDERDATE = current_date() - 1;
Click the download button when the query finishes running to save the resulting data to your local machine as a CSV file. Once stored on your local machine, you can send the file through Slack as you would any other, either by dragging it into the message box, or by double-clicking the Attachments & shortcuts button just below it and selecting your file.
Sure, it’s pretty simple, so if you need to only sync your data occasionally, this is a great option. But if you need to sync your data often, doing this method over and over again would probably make your head spin. 🔁
Syncing data from Snowflake to Slack using APIs
Now that we’ve gone over syncing steps using Census and manual methods, you can compare the simplicity of the API method with the former ones.
First, you obviously need to be able to access the APIs. You can access the Snowflake API out of the box, but you'll need to take a few steps to access the Slack API – and you can only do so by creating an app.
Click the Create New App button, opting to create one from scratch — unless you happen to have a manifest file ready. Pick an app name and the workspace to which you want to add it, then click Create App. On the next screen, under Add features and functionality, choose Permissions and these four Bot Token Scopes:
Click the Install to Workspace button to generate a Bot User OAuth Token starting with xoxb-. You’ll need this later, so be sure to save it!
Now, onto the actual syncing of data. We'll use pandas, the Snowflake connector for Python, and the Python Slack SDK to make this as easy as possible. Install those libraries using the queries below (if you haven’t done so before), then import them.
pip3 install snowflake-connector-python slack_sdk pandas
from slack_sdk import WebClient
import pandas as pd
import snowflake.connector
We'll start by exporting our data from Snowflake. To start the export, you'll need the same username, password and account that you use when logging into the web UI. If you normally log into the classic Snowflake web UI, you'll find your account in the URL: https://<your-account>.snowflakecomputing.com. Use the code below to create a Connection object.
conn = snowflake.connector.connect(
    user = "your-username",
    password = "your-password",
    account = "your-account"
    )
You're now ready to query your data. Our tutorial query is straightforward since we're simply retrieving yesterday's orders from a single table.
cursor = conn.cursor().execute(""" SELECT * FROM SNOWFLAKE_SAMPLE_DATA.TPCH_SF1000.ORDERS WHERE O_ORDERDATE = current_date() - 1; """) The cursor contains the resulting data as a list of tuples, which we can retrieve using fetchall. The cursor also contains the column names.
data = [i[0] for i in cursor.fetchall()]
columns = [i[0] for i in cursor.description]
Close the connection once you have retrieved all your data.
conn.close()Now save the data to a CSV file on your local machine.
df = pd.DataFrame(data=data, columns=columns)
df.to_csv('data.csv')
It’s time to move on to the Slack integration. Create a WebClient using the Bot User OAuth Token starting with xoxb-. We'll store the token as a regular variable right now, but for security reasons, don't do so when moving forward to production. You can thank us later.
token = "xoxb-****************************************************"
client = WebClient(token=token)
We'll show you how to send your data to a channel in our example, but you can also send it via a direct Slack message. You can make it easy on yourself now by using a channel name, (i.e. #development), but it'll be easier for you in the long run to use the ID instead. Believe us, if your channel is renamed in the future, it could cause a whole mess of problems for your sync.
Start by retrieving the list of channels in the workspace, and be sure to get their names and IDs. The Slackbot will need to join the channel(s) in question for it to be able to send messages to it, but you’ll only need to perform this part of the process once.
channels = client.conversations_list()

for i in channels.data['channels']:
    print(i['id'], i['name'])
client.conversations_join(channel='channel-id')You can upload a single file to a single channel or to multiple channels in one go like so.
client.files_upload(
    file = 'data.csv',
    channels = ['channel-1-id', 'channel-2-id'],
    title = 'data',
    initial_comment = 'Here is some important Snowflake data'
)
You can also upload multiple files in one fell swoop. Every file has a permalink that we can use to link to it. Formatting like we've done here isn't strictly necessary but it does lead to a more tidy and pleasant-to-read chat. ✨
# Upload multiple files
urls = []
for i in ['data1', 'data2', 'data3']:
response = client.files_upload(
file = f'{i}.csv',
title = i
)
# Formatting
url = response.data['file']['permalink']
url = f'<{url_private}| >'
urls.append(url)
urls = ''.join(urls)
message = "Here is some important data from Snowflake"
# Sending the files
client.chat_postMessage(
channel = 'channel-id',
text = f'{message} {urls}'
)Surprisingly, you can only send a message to one channel at a time when using postMessage as we've done above, but you can get around that limitation by iterating over the channels with a simple for loop if needed.
Before you go
That’s it! You now have three ways to sync your data from Snowflake to Slack. 🎉 The manual method, while tedious, is straightforward.
When it comes to using the APIs, we took a few shortcuts in showing you how to automate the process. Yes, this code will do the job for simple R&D environments, but when you move to a production environment, you’ll need a few extra bells and whistles. Because we didn't include any sort of scheduling, the “automatic API” process isn't very automatic. We also didn’t include logging, error handling and a range of other things that you need to think about when moving to production.
Census reverse ETL, on the other hand, streamlines the automation, seamlessly syncing your data from Snowflake to Slack regardless of what environment you’re in. Want to get started? Start syncing your data from Snowflake to Slack for free today!