


Today, there’s a seemingly endless supply of data tools that you can use for data analysis. Depending on your technical proficiency, you could use data warehouse solutions like Snowflake that allow you to query huge datasets, or you can use more basic, familiar tools like Google Sheets.
But if you want to switch from one tool to the other (or use both tools for different needs), you’ll face the challenges of moving data across the two disparate data stores. In this article, we will discuss three ways to transfer data from Snowflake to Google Sheets:
👍 The Good: Use Census to automatically sync data from Snowflake to Google Sheets
👎 The Bad: Connecting both with a Python script
😬 The Ugly: Manually importing and exporting CSVs
Snowflake is a great data warehouse…
Snowflake has quickly become one of the most popular data warehouse solutions. Their “data warehouse-as-a-service” product lets users launch clusters on major cloud infrastructures such as Amazon AWS, Microsoft Azure, and Google Cloud Platform.
Thanks to the flexibility, customers don’t have to leave their cloud infrastructure to harness the benefits of other services within the same cloud they already use. That’s not all data folks love about Snowflake, though; there are plenty of other factors that drove its popularity, including its SQL language support, versatile use cases, cloud agnostic benefits.
… But Google Sheets is so much easier to use
With all that said, Snowflake is obviously a powerful data lake solution – but that doesn’t mean it has all the features that Google Sheets has. If you’ve found yourself wanting to bring data out of Snowflake and into Google Sheets, you probably have one of Google Sheets’ business-centric features in mind, like:
- Variety of tasks for less technical users: On Google Sheets, you can access numerous formulas and visualize your data in graphs and charts. Although you can run some mathematical calculations in Snowflake, Google Sheets supports way more formulas and visualization options than Snowflake has.
- Templates: There’s no shortage of templates in Google Sheets. The pre-built templates help you jumpstart your data organization and present it in a user-friendly way. When you query data in Snowflake, the result gets displayed in a tabular form. With Google Sheets, you can effectively show various data such as grades, attendance, schedules, corporate balance sheets, and more – all in an organized fashion.
- Shareability: To share your analysis data in Snowflake, you’ll either need dashboards, or to export and send your query results to stakeholders. Google Sheets, however, exists in the Google ecosystem that has Gmail, Google Drive, and other convenient services, so when you finish analyzing data in Google Sheets, you can simply share the outcome by sending a unique link or inviting people. You can even simultaneously work with others and see real-time changes!
How to move data from Snowflake to Google Sheets
Now that the intros are all out of the way, let’s cut to the chase: How do you move data from Snowflake to Google Sheets? Google Sheets does not support direct connection to Snowflake, but we have 3 methods you can use to get your data from A to B.
The first method we’ll discuss is by far the quickest and easiest. With Census as the bridge, there are just four, simple steps:
- Connect Snowflake to Census
- Connect Google Sheets to Census
- Write a query to define what data will get transferred
- Run a sync.
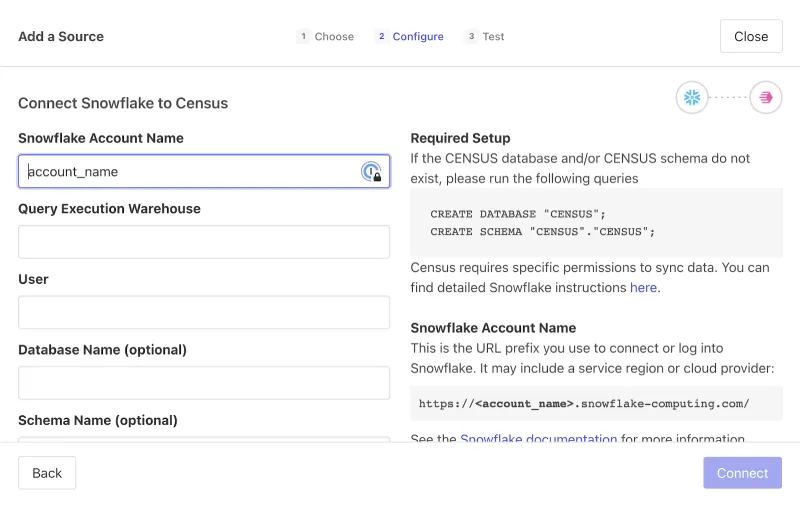
Step 1: Connect to Snowflake
From within Census, you’ll choose to Add a Source. Select “Snowflake”, as the data source, and then configure the conneciton. Connecting Census to Snowflake requires four, small details about your Snowflake account: The account name (which is the subdomain you use to connect to Snowflake), the query execution warehouse that will power the query, your user name, and your password.
For more information about connecting to Snowflake, see Census’s Snowflake docs.
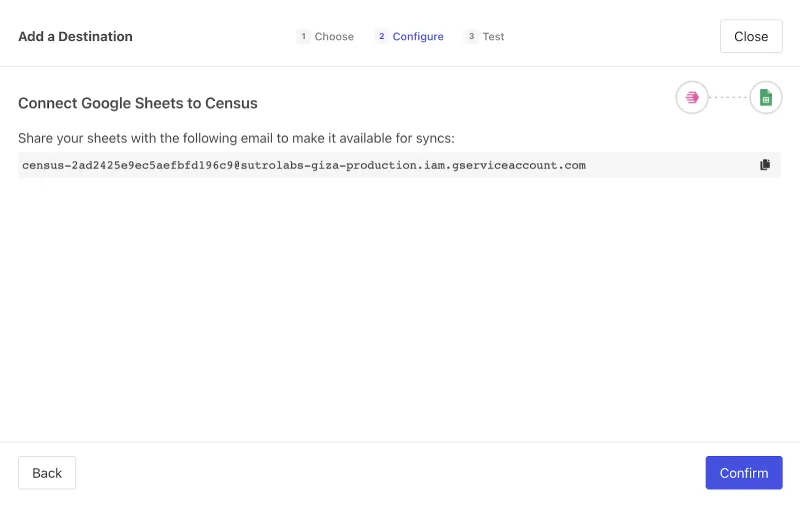
Step 2: Connect to Google Sheets
Again, navigate to Census and Add a Source. Select “Google Sheets”, then configure it by sharing access to the Google Sheet with the Census-provided service email.
For more information about connecting to Google Sheets, see Census’s Google Sheets docs.
Step 3: Write a Query
Yep, this step is as easy as it sounds: You can run any query that you like to define the table that will be synced to Google Sheets. The best part is that you can automate your query based on the date so, for example, you could have a rolling 28-day window of live-updating data in Google Sheets.
You can use the simple query below to get you started:
SELECT *
FROM my_table
WHERE timestamp > 2020-01-01
Step 4: Run a Sync!
Now, you can send data that is up to 10 million cells per spreadsheet (rows x columns). You can choose to schedule your sync to run on any time interval—from monthly or weekly to as soon as the data in Snowflake refreshes!
Better yet, you can “reverse ETL” your Snowflake data to over 60 destinations at over 4,000 records per second with the reliability and security that you expect for operational workloads. Pretty easy, right? While the Census method is pretty seamless, the methods only get more complicated from here on out.
The Bad: Running a Python script to sync data
This one is pretty heavy so strap in. 💺 Once we get started, you might opt to use the Census method instead…
When we read data from Snowflake, one convenient way is by utilizing Pandas's dataframe. You can install the Python Snowflake connector for Pandas by running the command below.
pip install "snowflake-connector-python[pandas]"Also, you’ll need to install PyArrow. After installing the prerequisites, refer to the following Python code to load the read data into a DataFrame.
ctx = snowflake.connector.connect(
          host=YOUR_SNOWFLAKE_HOST,
          user=YOUR_SNOWFLAKE_USERNAE,
          password=YOUR_SNOWFLAKE_PASSWORD,
          account=YOUR_SNOWFLAKE_ACCOUT,
          warehouse=YOUR_SNOWFLAKE_WAREHOUSE,
          database=YOUR_SNOWFLAKE_DATABASE,
          schema=YOUR_SNOWFLAKE_SCHEMA,
          protocol='https',
          port=YOUR_SNOWFLAKE_PORT)

# Create a cursor object.
cur = ctx.cursor()

# Write your SQL query to run.
sql = *select * from your_table"
cur.execute(sql)

# Finally fetch all the records and save the result into the data frame.
df_gs = cur.fetch_pandas_all()
Now that you have the data in the “df” data frame variable, we need to programmatically load it into Google Sheets.
To do so, you need to create a destination sheet where the data will be loaded. Go to Google Sheets to create one, then create a service account and OAuth2 credentials on the Google API Console. Follow the steps to enable the API and create your credentials.
- Visit the Google API Console.
- Create a new project via My Project > + button
- Find Google Drive API and enable it.
- Go to Credentials on the sidebar, click Create Credentials > Service Account Key.
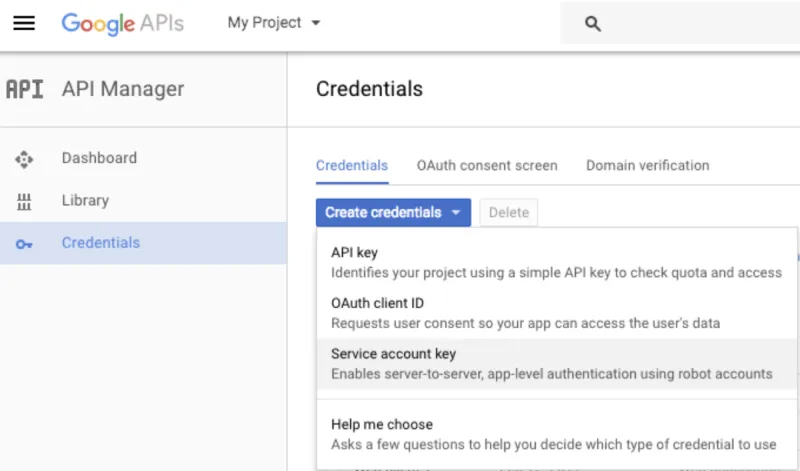
- Select Compute Engine service default > JSON > Create.
- Open the JSON file, share your spreadsheet with the "XXX-compute@developer.gserviceaccount.com" email listed.
- Save the JSON file into the location where you write the Python script that will load the data into Google Sheets.
To load data into Google Sheets, you need to install pygsheets.
import pygsheets
import pandas as pd

# Authorize
gc = pygsheets.authorize(service_file='YOUR_JSON_FILE_PATH')

# Open the Google Spreadsheet
sh = gc.open('YOUR_SPREAD_SHEET_NAME')

# To select the first sheet
my_sheet = sh[0]

# Insert the data frame starting from the cell B2.
my_sheet.set_dataframe(df_gs,(1,1))
Obviously, running a Python script gets the job done, but you’re looking at way more steps (and more places for potential missteps along the way).
The Ugly: Manual export and import
Finally, we’ve got a method for the DIY-ers. If you prefer manual options, you can export a CSV from Snowflake and import it into Google Sheets. To export data from Snowflake, there are two methods.
Unloading into a stage and downloading locally
The first method for exporting data from Snowflake involves unloading data from a table into a Snowflake stage using the SQL “COPY” command, then downloading the data files into your local drive using the “GET” command.
Run the “COPY” command
To unload data into an internal location, we’d recommend using the “COPY” command with the following syntax. To load data into Google Worksheet, the file type needs to be CSV.
COPY INTO { internalStage }
     FROM { [<namespace>.]<table_name> | ( <query> ) }
[ PARTITION BY <expr> ]
[ FILE_FORMAT = ( { FORMAT_NAME = '[<namespace>.]<file_format_name>' |
                    TYPE = { CSV | JSON | PARQUET } [ formatTypeOptions ] } ) ]
[ copyOptions ]
[ VALIDATION_MODE = RETURN_ROWS ]
[ HEADER ]
In this case, the {internalStage} section follows the syntax below.
internalStage ::=
    @[<namespace>.]<int_stage_name>[/<path>]
  | @[<namespace>.]%<table_name>[/<path>]
  | @~[/<path>]
Of course, it’s one thing to see the basic syntaxes, and another to actually put these to use. Here are a few examples of some real-world applications!
- Example 1: Here, the “COPY” command unloads all data from the students table into the table’s stage using the folder/filename prefix (result/data_), a named file format (yourformat) and “CSV” for file type (to load into Google Sheets).
copy into @%students/result/data_
from students file_format = (format_name='yourformat', type='CSV');- Example 2: In this case, the command unloads the result of a query into a named internal stage (your_stage) using a folder/filename prefix (result/data_), a named file format (yourformat) and “CSV” for file type (to load into Google Sheets).
copy into @your_stage/result/data_ from (select * from students)
file_format=(format_name='yourformat', type='CSV');
Although these two examples are functionally identical, there are a couple key differences: The first one unloads data into the table’s stage while the second one unloads data into the internal stage. In case you have questions regarding the differences between table stage and internal stage, take a look through this Snowflake documentation that dives into the details.
Run “GET” command
Once you’ve unloaded the data, Snowflake’s “GET” command lets you download the staged files using the below syntax.
GET internalStage file://<path_to_file>/<filename>
    [ PARALLEL = <integer> ]
    [ PATTERN = '<regex_pattern>'' ]
The {internalStage} section follows the same rules as the “COPY” command, so in order to run the “GET” command, make sure these match.
internalStage ::=
    @[<namespace>.]<int_stage_name>[/<path>]
  | @[<namespace>.]%<table_name>[/<path>]
  | @~[/<path>]
Depending on your Operating System, file://<path_to_file>/<filename> has different structure.
- For Linux/Mac: include the initial forward slash in the path (e.g. file:///tmp/load).
- For windows: include the drive and backslash in the path (e.g. file://C:\temp\load).
If we want to download the files from the table stage into a /tmp/data folder in Linux, it will look like this.
get @%students file:///tmp/data/;Download from Snowflake Worksheet
If you don't want to waste time unloading into a stage, there is a simpler option for exporting your Snowflake data. Using the Snowflake console and downloading data from a Snowflake Worksheet can save you tons of time.
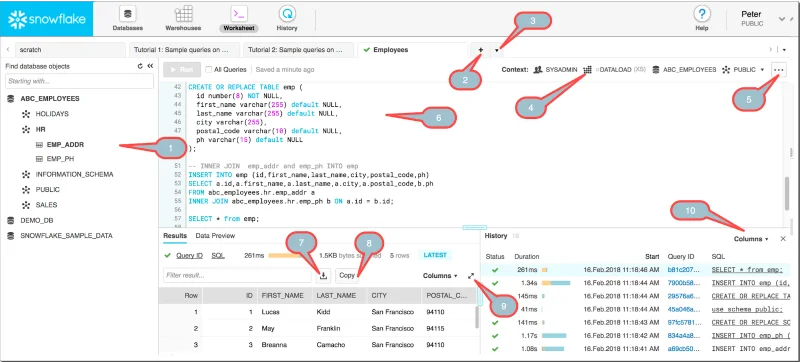
Among the console options above, balloon 7 is what you’re looking for. After executing your query, click the icon to save the result into your local storage.
Import CSV into Google Sheets
We now have our data exported from Snowflake, so it's time to load the CSV file into Google Sheets.
- Go to the Spreadsheet you want to load your CSV data in. If you aren’t planning to paste the data into an existing Spreadsheet, create a new one.
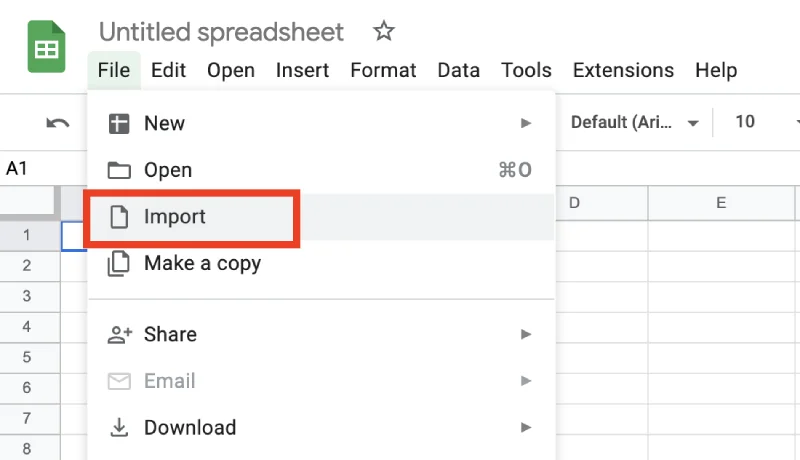
- Go to File > Import
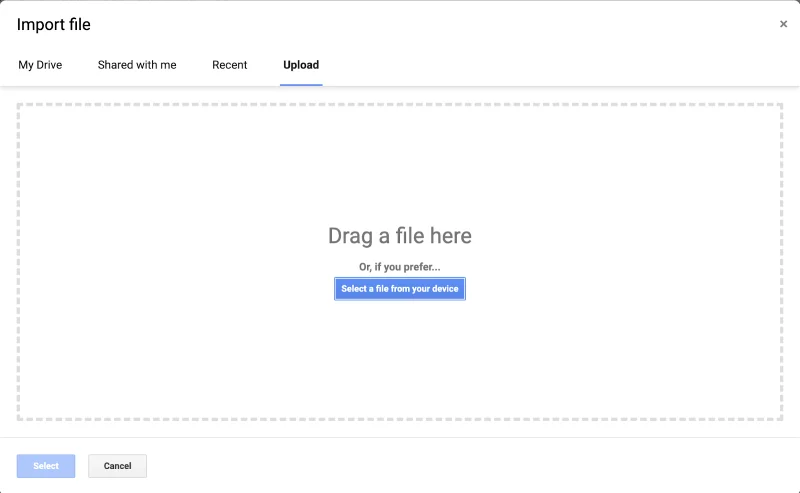
- Then go to the Upload tab and drag and drop your CSV file.
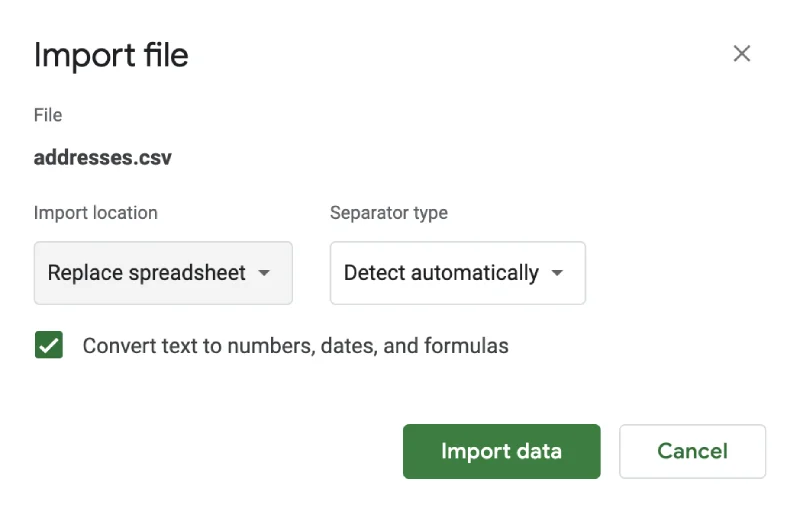
- It will show you another pop-up screen. Select the options according to your needs. Click Import data.
- The CSV data will now appear in your Google Spreadsheet. Depending on the file size (and amount of data you’re importing), it can take some time until data loading gets completed.
Wrapping up 🎁
In this article, we’ve learned how to move data from Snowflake to Google Sheets using three methods. Depending on your use case, one option may work better than the others.
If you think you will be likely to perform data transfer more often or regularly, you’re definitely better off saving some time (and headaches) using Census. If you just need the data once, a manual export is probably fine for you! But guess what, if you do it once, odds are, you’ll have to do it again.
Ready to get started? Get your free Census account and start syncing today! 🔄