


SQLAlchemy is one of the most popular libraries to interface with relational databases in Python. Its distinguishing feature is the object-relational mapper (ORM), which allows software engineers to develop classes and automatically map them to a database.
Sure, SQLAlchemy is known to support operational databases, but did you know it supports also data warehouses like Snowflake? While ORM use cases are less frequent with data warehouses like Snowflake, SQLAlchemy provides a solid interface for running analytical queries.
In this tutorial, you’ll learn several different approaches to how to set up SQLAlchemy to interface with a Snowflake data warehouse. We’ll also explore the various pitfalls of these approaches so you can be prepared for anything. 💪
Snowflake + SQLAlchemy
Since Snowflake is a data warehouse, its main users are analytics professionals. Although many of them will interact with it through a SQL IDE, others will prefer to embed queries in their Python code.
But while Python is widely used in the data world, most applications require some kind of database technology for storing and processing relational data. That’s where SQLAlchemy comes in. 🦸
SQLAlchemy is a well-known library for interfacing with all kinds of database technologies like Oracle, Postgres, and of course, Snowflake, offering a unified way to run queries on both operational and analytical databases. Plus, it’s widely supported and vendor-agnostic, which helps organizations avoid software lock-in.
Here are a few use cases to show just how powerful it is. 👇
ORM
To translate the logical representations of objects into an atomized form that can be stored in a database, you use an object-relational mapper.
SQLAlchemy is a high-performing and accurate toolkit that’s used in tens of thousands of applications, so it excels in the area of object-relational mapping. Since it was designed with the database administrator (DBA) in mind, generated SQL can be swapped out for hand-optimized statements, making it a flexible solution for most ORM use cases in Python.
SQL Engine
Nowadays, most data professionals working in Python use pandas, a data analysis and manipulation tool centered around the DataFrame. pandas has the built-in capability to translate the results of database queries to a DataFrame, but it requires a connector to a database. While most people are familiar with Open Database Connectivity (ODBC) and Java Database Connectivity (JDBC), you might not know that Snowflake also has its own proprietary connector.
The Snowflake connector uses a cursor to retrieve data and put it in a pandas DataFrame object, but there's a more convenient way to do this – one that allows analysts to query Snowflake within their familiar pandas experience.
Using SQLAlchemy with Snowflake
To generate a pandas DataFrame from Snowflake query results in Python, you could use the Python connector. However, a more straightforward solution is to use a SQLAlchemy engine with pandas’ read_sql function. Below, both solutions are presented.
Setup
To interface with Snowflake from Python, you’re going to need some packages. They can be installed with pip install in your terminal, or in a notebook cell by appending the commands with an exclamation mark, as shown in the example below. Note that these versions have been set to ensure that they don’t run into any compatibility issues:
!pip install 'snowflake-sqlalchemy==1.4.2'
!pip install 'typing-extensions>=4.3.0'
!pip install 'snowflake-connector-python==2.7.9'
Once installed, set your credentials, which can be found by logging into your Snowflake account and workspace, in the following dictionary object:
credentials = {
'account': '<YOUR_ACCOUNT>',
'user': '<YOUR_USERNAME>',
'password': '<YOUR_PASSWORD>',
'database': '<YOUR_DATABASE>',
'schema': '<YOUR_SCHEMA>',
'warehouse': '<YOUR_WAREHOUSE>',
'role': '<YOUR_ROLE>'
}
Throughout the next sections, we'll be using the example Snowflake TPC-H benchmark data set. The following query calculates an aggregation of revenue and the number of orders per customer and per order status.
query = """
SELECT
O_CUSTKEY,
O_ORDERSTATUS,
SUM(O_TOTALPRICE) AS sum_totalprice,
COUNT(O_ORDERKEY) AS count_orderkeys
FROM TPCH_SF1.ORDERS
GROUP BY
1, 2
LIMIT 10;
"""
In the sections below, we’ll execute this query in two different ways.
Generate a pandas DataFrame from a Snowflake Query with the Snowflake Connector
In this section, we’ll generate a DataFrame by iterating over the rows of a query result.
To start, import and create a Snowflake connector object. To make it work properly, you’ll need to provide it with the credentials you specified in the credentials dictionary you set earlier:
import pandas as pd
import snowflake.connector
con = snowflake.connector.connect(
account = credentials['account'],
user = credentials['user'],
password = credentials['password'],
database = credentials['database'],
schema = credentials['schema'],
warehouse = credentials['warehouse'],
role = credentials['role']
)
With the next piece of code, we’ll create a generate_df function. We’ll then indicate a cursor, a SQL query, and the maximum number of rows that should be loaded in a DataFrame. The function uses the cursor’s fetchmany method, which returns a fixed number of rows:
def generate_df(cur, query, n):
cur.execute(query)
col_names = [col.name for col in cur.description]
rows = 0
while True:
dat = cur.fetchmany(n)
if not dat:
break
df = pd.DataFrame(dat, columns = col_names)
rows += df.shape[0]
return df
Next, execute the generate_df function with a cursor based on the connection you opened earlier, a query, and optionally, the number of rows you’d like the function to return:
df = generate_df(con.cursor(), query, 10)
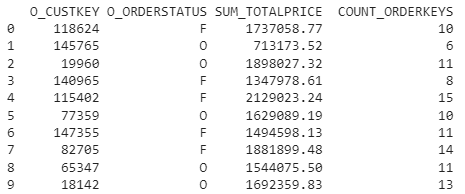
If you inspect the contents of your DataFrame, you should see the following results:
Note that the number of connections you can open is finite, so it's good practice to close the connection you opened. Otherwise, you’ll run into issues if you run a large number of queries in a short time span:
try:
con.close()
except Exception as e:
print(e)
Generate a pandas DataFrame from a Snowflake Query with SQLAlchemy
Alternatively, you could use SQLAlchemy to wrap the Snowflake connector in an easy-to-use interface.
To do so, we’ll start by loading the required modules. You’ll notice that it not only loads SQLAlchemy, but also a module from the Snowflake SQLAlchemy toolkit, which acts as a bridge between SQLAlchemy and Snowflake.
Next, we’ll create a SQLAlchemy engine containing all the information that SQLAlchemy needs to interface with a database technology (which in this case is Snowflake). The engine is created with a Snowflake connection string, constructed by the URL function:
from snowflake.sqlalchemy import URL
from sqlalchemy import create_engine
import pandas as pd
engine = create_engine(URL(
account = credentials['account'],
user = credentials['user'],
password = credentials['password'],
database = credentials['database'],
schema = credentials['schema'],
warehouse = credentials['warehouse'],
role = credentials['role']
))
Setting up the engine is basically all you need to do. Unlike the previous example, you don’t need to make custom functions to fetch all the rows from query results.
From the engine, you can open a connection and pass it to the pandas read_sql method alongside the query:
con = engine.connect()
df = pd.read_sql(query, con)
Again, it’s best practice to close the connection, and optionally remove the engine:
try:
con.close()
except Exception as e:
print(e)
try:
engine.dispose()
except Exception as e:
print(e)
You can see that loading a DataFrame with data from Snowflake is much easier if you use SQLAlchemy. All you need is two lines of code to execute a query and load it into memory. 🤷
Common errors
Despite the simplicity of this solution, there are a number of issues that have been reported across the internet. Luckily, most issues are known and have straightforward solutions. Here are a few. 👇
NoSuchModuleError: Can't load plugin: sqlalchemy.dialects:snowflake
It’s possible that the Snowflake dialect can’t be found when creating an engine. This can be solved in two different ways.
First, try reinstalling SQLAlchemy:
pip install --upgrade sqlalchemy
If that doesn’t work, try registering the Snowflake dialect explicitly in the SQLAlchemy register by referring it to the Snowflake SQLAlchemy bridge:
from sqlalchemy.dialects import registry
registry.register('snowflake', 'snowflake.sqlalchemy', 'dialect')
ModuleNotFoundError: No module named 'snowflake.sqlalchemy'
Some Anaconda users are unaware of the required Snowflake-SQLAlchemy bridge. While it can be installed through pip, Anaconda users can install it through the conda command. However, the package is not in the default channel, but in conda-forge. This requires that you set the channel parameters, as follows:
conda install -c conda-forge snowflake-sqlalchemy
snowflake.connector.errors. OperationalError: 250003: Failed to get the response
Many people report getting this error when setting up their connection for the first time. The most common root cause is that they ignored a warning in the documentation and included snowflakecomputing.com in their account identifier. Dropping it will likely solve the issue.
pandas only writes NULLs to Snowflake
pandas can do more than just read data from Snowflake, it can also write to it. However, some users reported getting columns with only NULL values, and no error or warning to indicate why. The cause? Snowflake expects uppercase column names. Fixing it is easy. Just change the case of your column names as follows:
df.columns = df.columns.str.upper()
AttributeError: 'SnowflakeCursor' object has no attribute cursor
When you’re using pandas’ to_sql method, it expects a SQLAlchemy engine, not a Snowflake connector object. To get rid of this error, replace the Snowflake connector with the correct SQLAlchemy engine.
Use Snowflake and SQLAlchemy with confidence 🙌
This tutorial walked you through using Snowflake with SQLAlchemy to run SQL queries and store the results as pandas DataFrames. You probably noticed that using SQLAlchemy to interface with Snowflake from Python is superior to using the default connector in terms of simplicity. By creating an SQL engine and providing it to pandas methods, data professionals can work from within their familiar pandas setup.
After you integrate Snowflake and SQLAlchemy and you need a solution to sync your Snowflake data with your sales and marketing tools, Census has your back. Book a demo with a product specialist to see how Census can make your data actionable. 🚀