


Everything in the business world comes back to data.
Marketing teams, especially, rely on data teams to keep their information fresh, whether that’s for updating out-of-date contact properties or adjusting lead scores. Regardless of the use case, it all comes back to data. 🔁
We’ll be the first to admit – the result of these tasks is totally necessary for healthy business ops, but we’ll also admit that the manual methods required to get these results force your team to focus their time and energy on administrative work (which isn’t the best use of their skills).
If you’re involved in this manual effort, you know just how time-consuming it can be to update existing records. And if data folks at your company are already stretching themselves thin while tackling several other projects simultaneously, this process might become altogether infeasible. All this manual work not only takes a ridiculously long time, but also prevents data teams from focusing on other critical, revenue-generating work. 🛑
That’s where bulk update functionality comes in. Bulk updating methods can help data teams reliably speed up these data refreshes so they can turn their attention to more important tasks – you know, the ones they’re supposed to be focused on.
We’re here to walk you through it. This article will be your guide to:
- What bulk updating methods are and what situations they’re appropriate for
- A step-by-step guide for performing bulk updates with Census reverse ETL (rETL)
Common methods of bulk updating with HubSpot
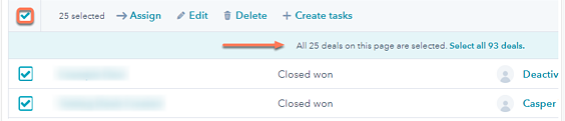
Sure, Hubspot has ways to bulk update manually or via the API, but you can also make bulk updates to records directly from the front-end in a snap. 🪄 Go to Contacts, Companies, or Deals views and click the Select All checkbox. This will activate a banner that allows you to select all of the records in your view, instead of only those on the current page, and then prompts you to confirm the change.
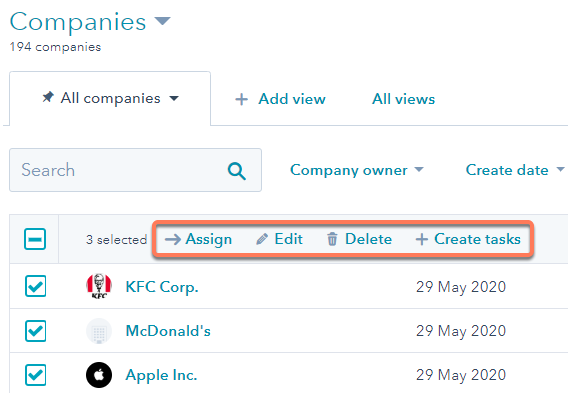
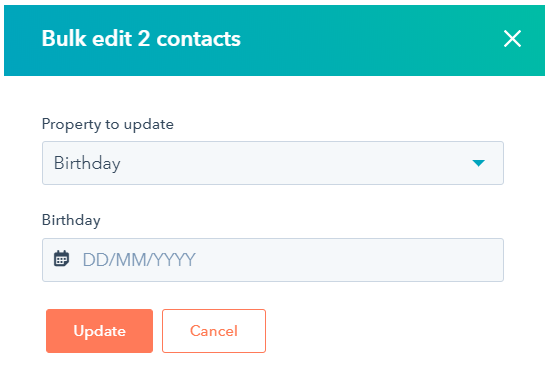
You can perform bulk updates on contact records, calls, tickets, deals, companies, or custom objects. In that case, the objectives would then be to assign user records, edit specific properties, create record-specific tasks, or add records to a static list (for Contacts and Companies only).
When using the API, there are some limitations that allow a maximum of 150 updates per 10 seconds on the highest (Professional or Enterprise) plan. You can, however, purchase an API add-on which will bump this up to 200 updates per 10 seconds. On the data team side, you’ll still likely need to develop some code to rate-limit the amount of data you send through in a 10-second window or have additional retry mechanisms in case you exceed this.
Overview: Bulk updates with Census
You'd be hard-pressed to find a business that derives all its data from a single source, but collecting data from third-party tools and databases adds another layer of complexity to the process.
Census addresses this pain point with a reliable way to import customer data from all your tools and databases into HubSpot, allowing you to easily migrate all that information and scale to handle your growing client base. Before you ask: Yes, it does seamlessly address dropped connections by picking up where it left off the moment the connection is restored.
Data type conversions are handled automatically in the background, so no more worrying about typecasting all your data before importing it. Census also tracks what data changes and syncs only that with the Bulk Update API, so you can rest easy knowing that you won’t exceed your quota.
You can unify your data by writing queries and mapping fields so that the data fits into HubSpot without issues, regardless of whether you’re syncing data from one or multiple data sources—including Google BigQuery, Databricks, dbt, Elasticsearch, Looker, Google Sheets, Panoply, Amazon Redshift, Rockset, and Snowflake. You can even import data from traditional databases like Microsoft SQL Server (MSSQL), MySQL, and Postgres, making your data HubSpot-ready with custom queries and field mappings, regardless of the source of your data.
Census layers over your existing data infrastructure, consolidating all your data in one location and syncing it to your preferred tool, providing access to accurate data for anyone who needs it, and eliminating the need to keep another system in sync. 🙌 The centralized hub-and-spoke data synchronization architecture is scalable, more accurate, easier to maintain, more secure, and more affordable (so it’s obviously preferred over a point-to-point integration).
Your guide to implementing Census for HubSpot bulk updates
So, how do you get Census up and running and use it to perform a bulk update? Check it out:
1. Sign up for a Census account
Head over to the Census website and sign up for a 14-day free trial, which lets you explore how Census supports HubSpot bulk updates in a low-risk way.
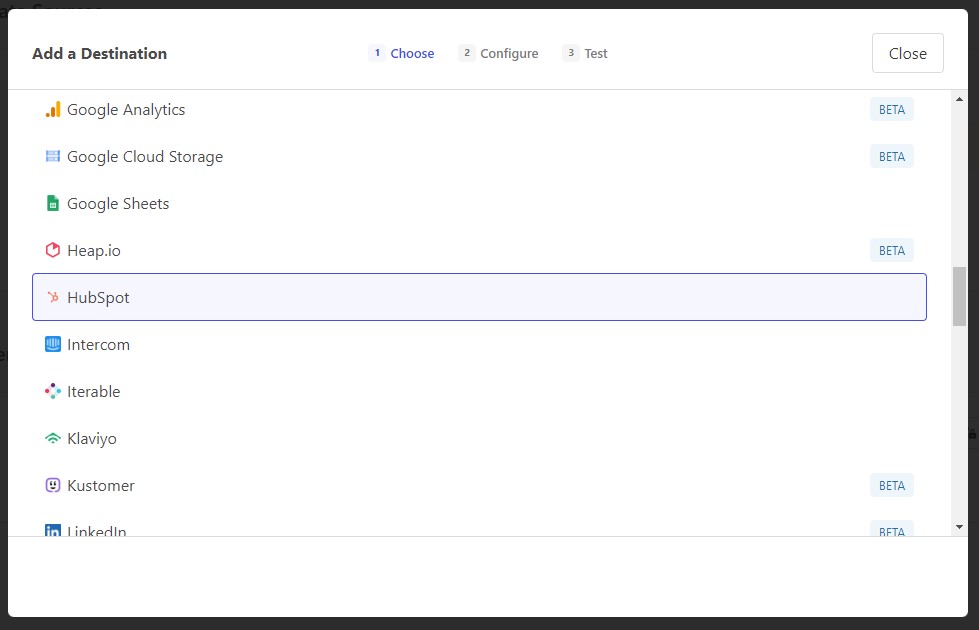
2. Add HubSpot as a service destination
Click the Add Service button on the Connections page and follow the secure authentication (OAuth) process.

3. Connect any of the currently supported data warehouse types for HubSpot
Supported data warehouse types currently include the following (but this list is ever-expanding): Databricks, Google BigQuery, Google Sheets, Postgres, Amazon Redshift, Rockset, or Snowflake. Keep in mind – you’ll need appropriate credentials to access your data source.
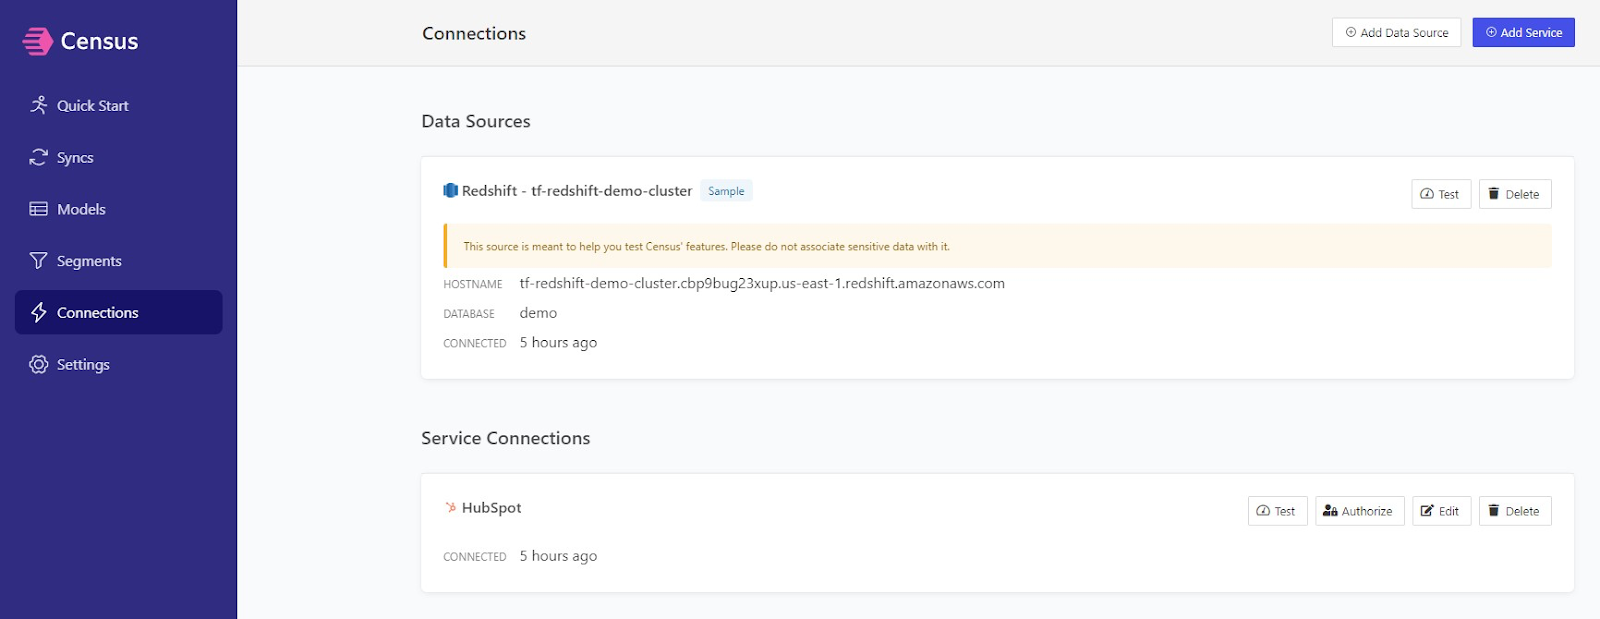
Now, your Connections page should now look like this:
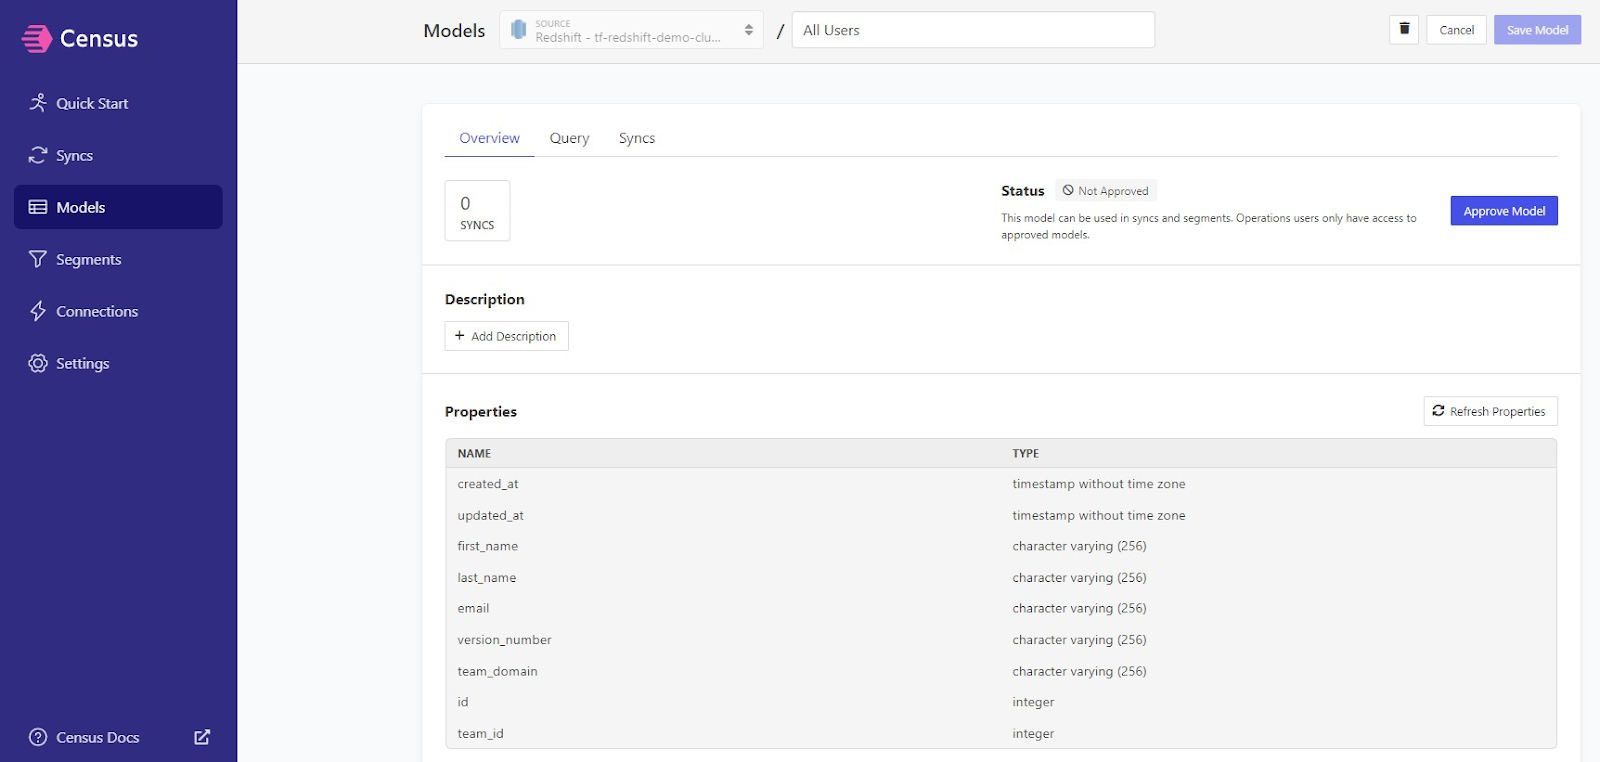
4. Build your first model using the Models section of your dashboard
You don’t even need to know SQL for this! Census’s Audience Hub allows you to interact directly with models. To build your first model, select the data you want to see in HubSpot, such as:
- The lifetime value of a customer to add it to Companies or Contacts
- The end date of the customer’s trial
- The date the customer started using your product
- The number of vital activities the user performed in your app over the last seven to 30 days
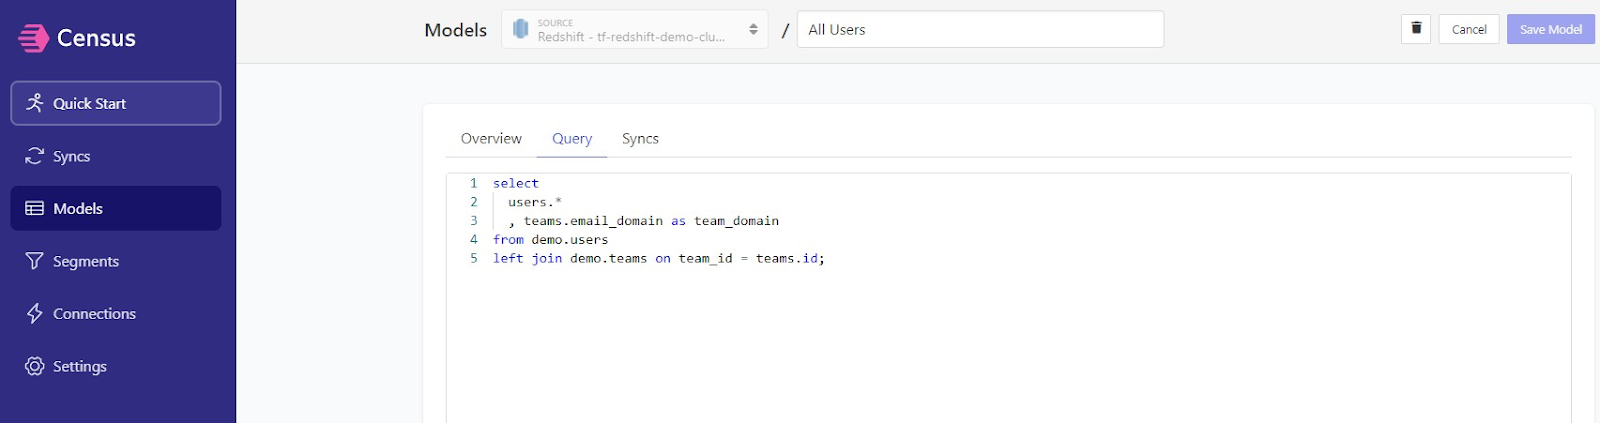
As soon as you’ve created your model, you can save it.
5. Create a new sync
Create a new sync from the Syncs page using the Add Sync button, then select the data you want to sync:
a. Begin by selecting the data warehouse you connected to earlier under Connection.
b. Choose the model you created above as your Source.

c. Specify where you want data to sync to.

d. Choose HubSpot as the destination under Connection.
e. Under Object, pick whether you want to sync to Contact or Company.
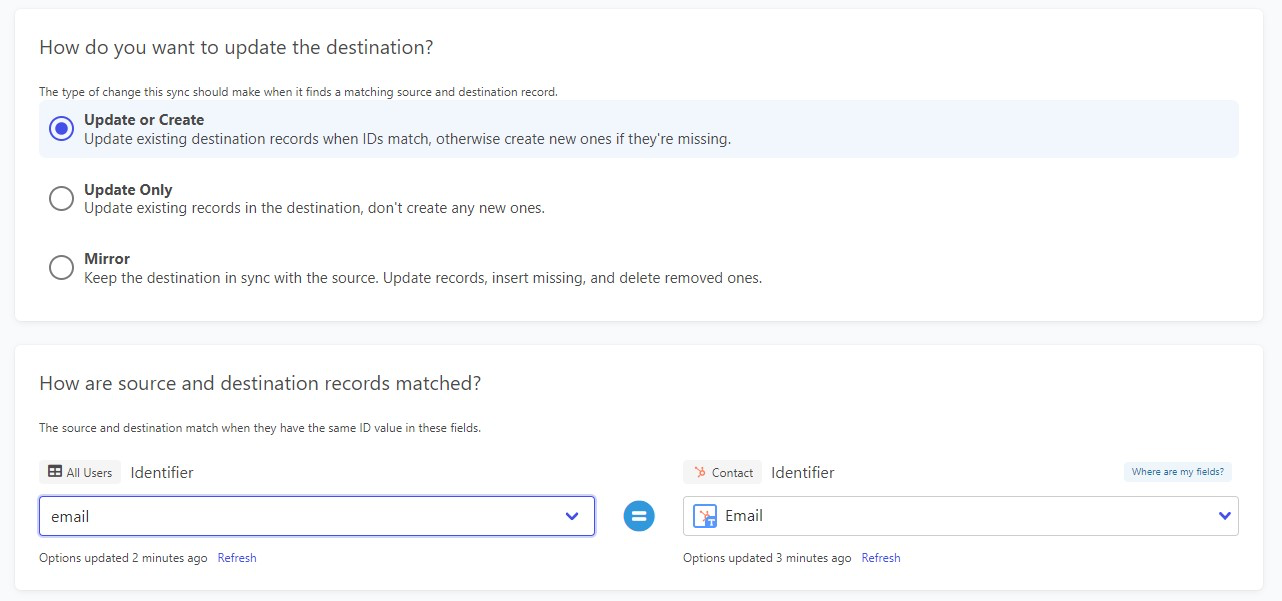
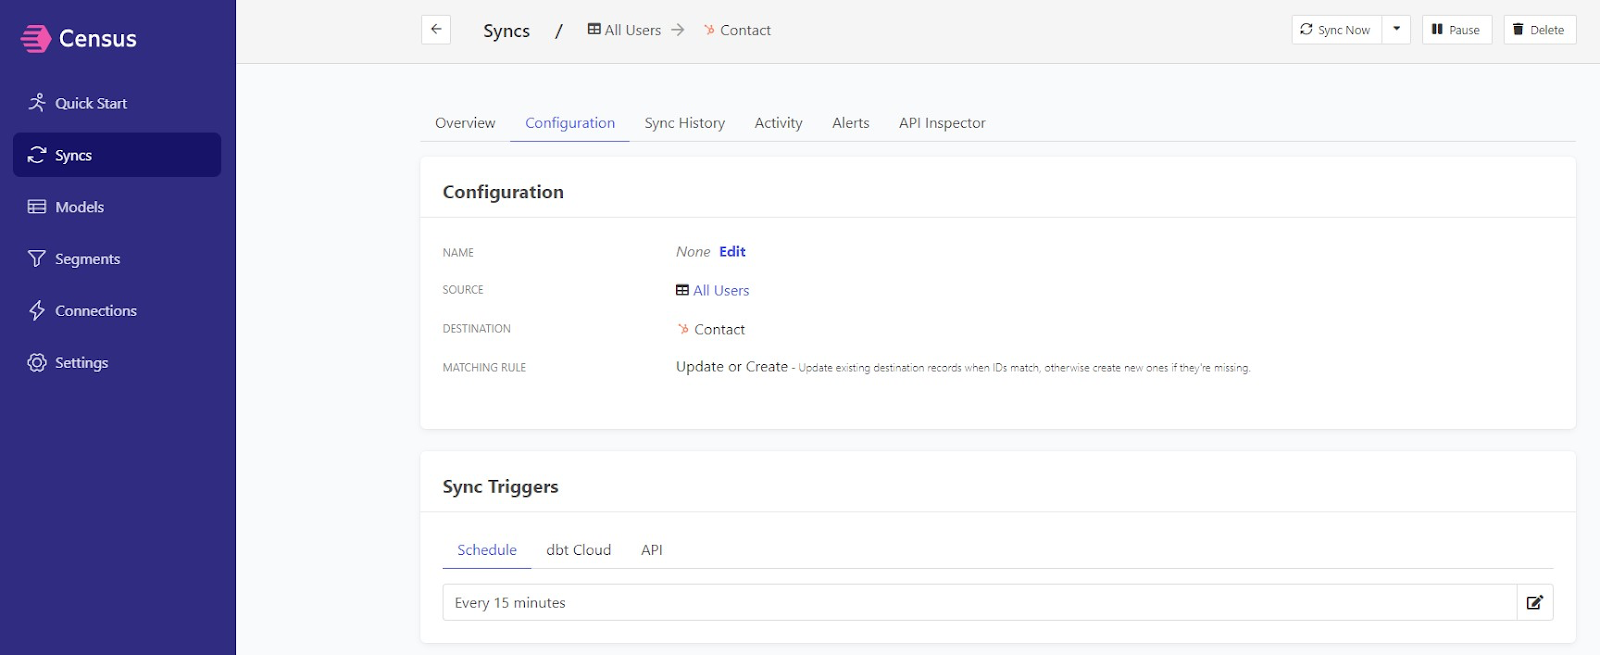
6. Select how you want the changes to be synced
Select your desired sync behavior from the Update or Create, Update Only, or Mirror options, then choose the appropriate mapping key (either Email for Contacts or Domain for Companies). To align yourself with ✨ best practices ✨, use your own internal contact ID.
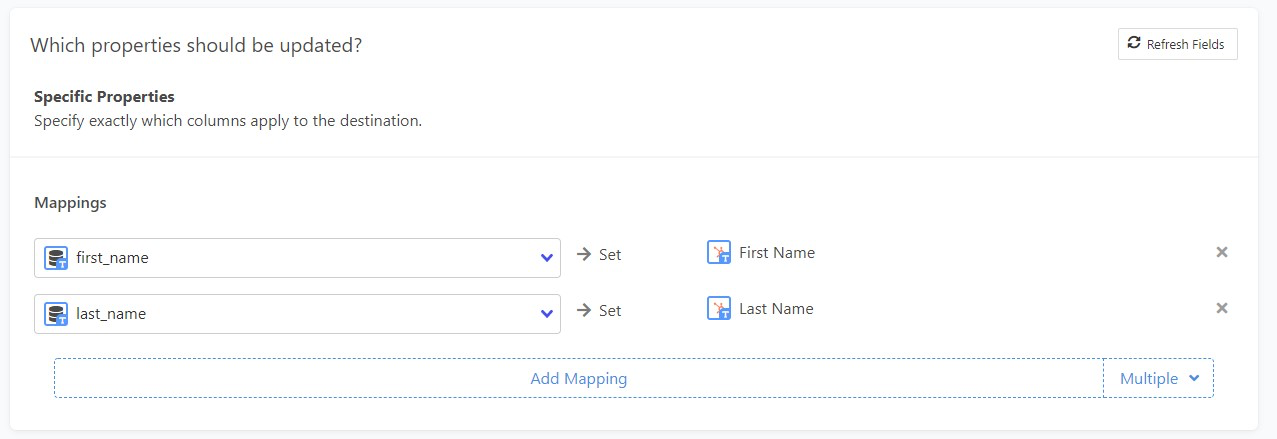
7. Select the fields you’re updating in the mapper
Map the field from your model to your HubSpot instance and select your preferred data for HubSpot after creating a new sync. Select the data you want to sync, and map it to HubSpot Objects.
8. Select a schedule after enabling the sync
After confirming that the final preview highlights what will happen when you begin the sync, revisit HubSpot and view the Contact or Company record type that should have been updated. Your data should be visible in HubSpot if you’ve done everything correctly.
Just like that, your bulk updating is done, with plenty of time to focus on everything else on your to-do list. 🎉
The more you know
A lot of data teams out there are used to performing batch updates themselves because they think it’s quicker than building a big ETL process to handle such requests. Sure, it might seem quicker on the surface, but they forget to take into account all the minutes taken “here and there” that add up, or the time it takes to refocus when you have to stop your work to do an urgent batch update.
Then there’s the other end of the spectrum: There are data teams that acknowledge the inherent problems with manual bulk updates and decide to build their own ETL process – but end up involved in a long and expensive process that they didn’t sign up for.
Luckily, you now fall into a third category (whether you’re officially part of the data team or not): The data teams that know about a few general methods of bulk updates and how to bulk update in HubSpot with a simple eight-step reverse ETL solution. By following the steps above, you can use Census to radically change your data approach.
Want to get started? Sign up for your free Census account and start bulk updating!