


There’s so much you can do with data, but it can be frustrating and overwhelming when you can’t process it into useful information.
This is where services like Snowflake come into play, allowing data analysts and engineers to process and manage their data efficiently without the fuss.
🤔 But how do you route this data across work-related suites? Do you have to repeat the same process in every suite? In this article, we’ll explore workflow automation with Zapier and how to route data from Snowflake.
What’s Snowflake?
One of the best things about cloud computing is the ability for users to pay as they go and access services anywhere from the internet. And Snowflake is just one of the cloud-based data computing services that enable data folks to collaborate both locally and globally. Instead of traditional data silos that are generally inaccessible, Snowflake allows all necessary teams access to data. 🤝
With that said, most Snowflake users know all about its benefits: How scalable it is, how it can store your data, and the loads of cool features under its belt. But until recently, most customers were thinking about using the data stored there solely for business intelligence and dashboards.
🌊 Now, the tides are turning, and Snowflake is becoming more of a center for business operations instead of “just a data warehouse.” To really capitalize on its power, we need to connect it to the apps that people use every day – like Slack and, of course, Zapier.
Workflow automation with Zapier
When developers incorporate workflow automation into their system, it makes their work easier. Think of any repetitive process that you complete over and again. With workflow automation tools like Zapier, teams can automate their workflows and Zap from point A to point B.
This comes with some perks like the ability to share data across the different layers that require them. Zapier not only allows you to automate your workflow, but it also allows you to integrate web applications of your choice.
Why would you want workflow automation?
- Faster response. Incorporating workflow automation into your execution process allows for faster execution and response times because the time needed for human intervention has effectively been eliminated. ⏰
- Reduced error. Since work processes run automatically, they are devoid of human error. After writing workflow rules and testing them, they should run successfully over and over again. 🔁
- Proper communication. Employees can communicate better and reduce setbacks as they work.
- Avoid repetitive tasks. By grouping all tasks that follow the same process in one batch, they run automatically without human intervention. 🙅
Creating a new Snowflake-Zapier integration
So, how do you set this workflow automation up? We’ve created an example scenario to show you how to manually set up a Snowflake 👉 Zapier integration to fetch data from a SQL table. First, set up a Snowflake account and a data warehouse using the code samples in the Snowflake documentation.
Setting up Snowflake
You need actual data in your warehouse before it can be considered a data warehouse. In this tutorial, we’ll fetch data from a SQL database. After that, we’ll use the Snowflake Node.js driver to make a connection. You can install the sdk with npm.
npm install snowflake-sdkAfter installing snowflake-sdk, we’ll make a connection. Snowflake also has the single and pool connection option so that you don’t have to create a connection each time your client application needs to access Snowflake. However, for the purpose of this tutorial, we’ll create a single connection.
// Load the Snowflake Node.js driver.
var snowflake = require('snowflake-sdk’); // Create a Connection object that we can use later to connect. var connection = snowflake.createConnection({ ... authenticator: "OAUTH", token: "<your_oauth_token>" }); // Try to connect to Snowflake, and check whether the connection was successful. connection.connect( function(err, conn) { if (err) { console.error('Unable to connect: ' + err.message); } else { console.log('Successfully connected to Snowflake.');
 			// Optional: store the connection ID.
            connection_ID = conn.getId();
            }
    }
);
In the code above, we’re using OAUTH for authentication, so you’ll need to add your OAUTH_TOKEN. Hint: It's best to store your OAUTH_TOKEN as a secret in an .ENV file. Next, you can upload a file containing your data to Snowflake stage using the PUT command.
connection.execute({
  sqlText: 'PUT file://C:\\Users\\Username\\Files\\employees0*.csv @DATABASE.SCHEMA.%TABLE;',
  complete: function (err)
  {
    var stream = statement.streamRows();
    stream.on('data', function (row)
    {
      console.log(row);
    });
    stream.on('end', function (row)
    {
      console.log('All rows consumed');
    });
  }
});
Now that you have data in internal storage, let’s implement the Zapier integration.
Setting up Zapier
Set up a Webhooks trigger for your Snowflake application. If you don’t already have a Zapier account, follow this link to get one. Then navigate to your dashboard and click the Create Zap button.

|
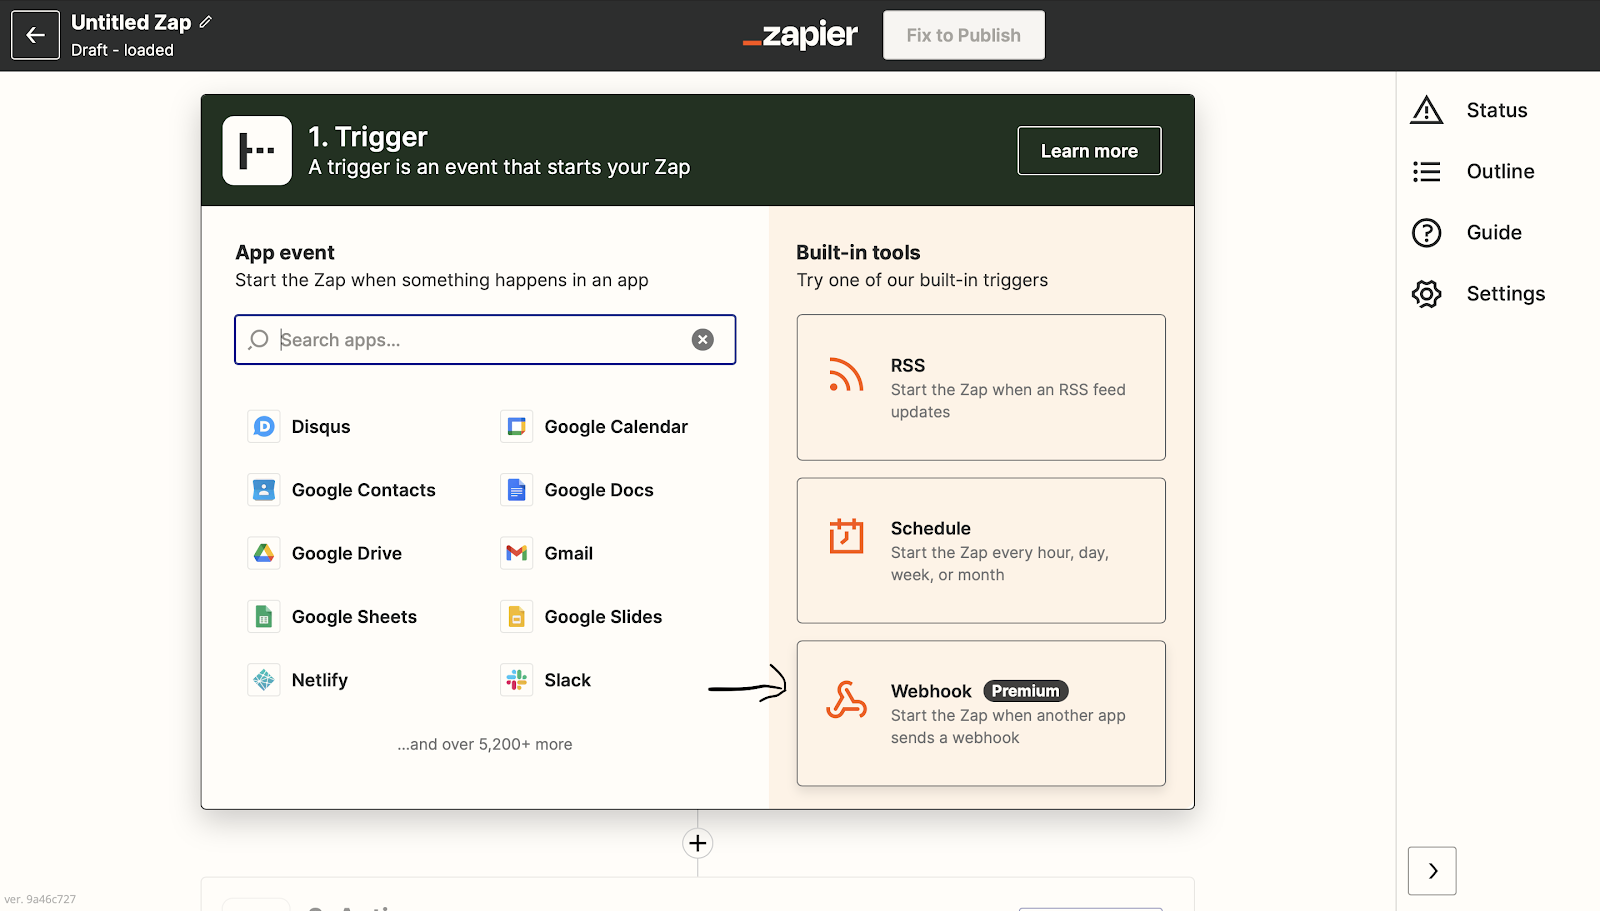
Next, chose the Webhook button to create a Zapier to Snowflake Webhook.
|
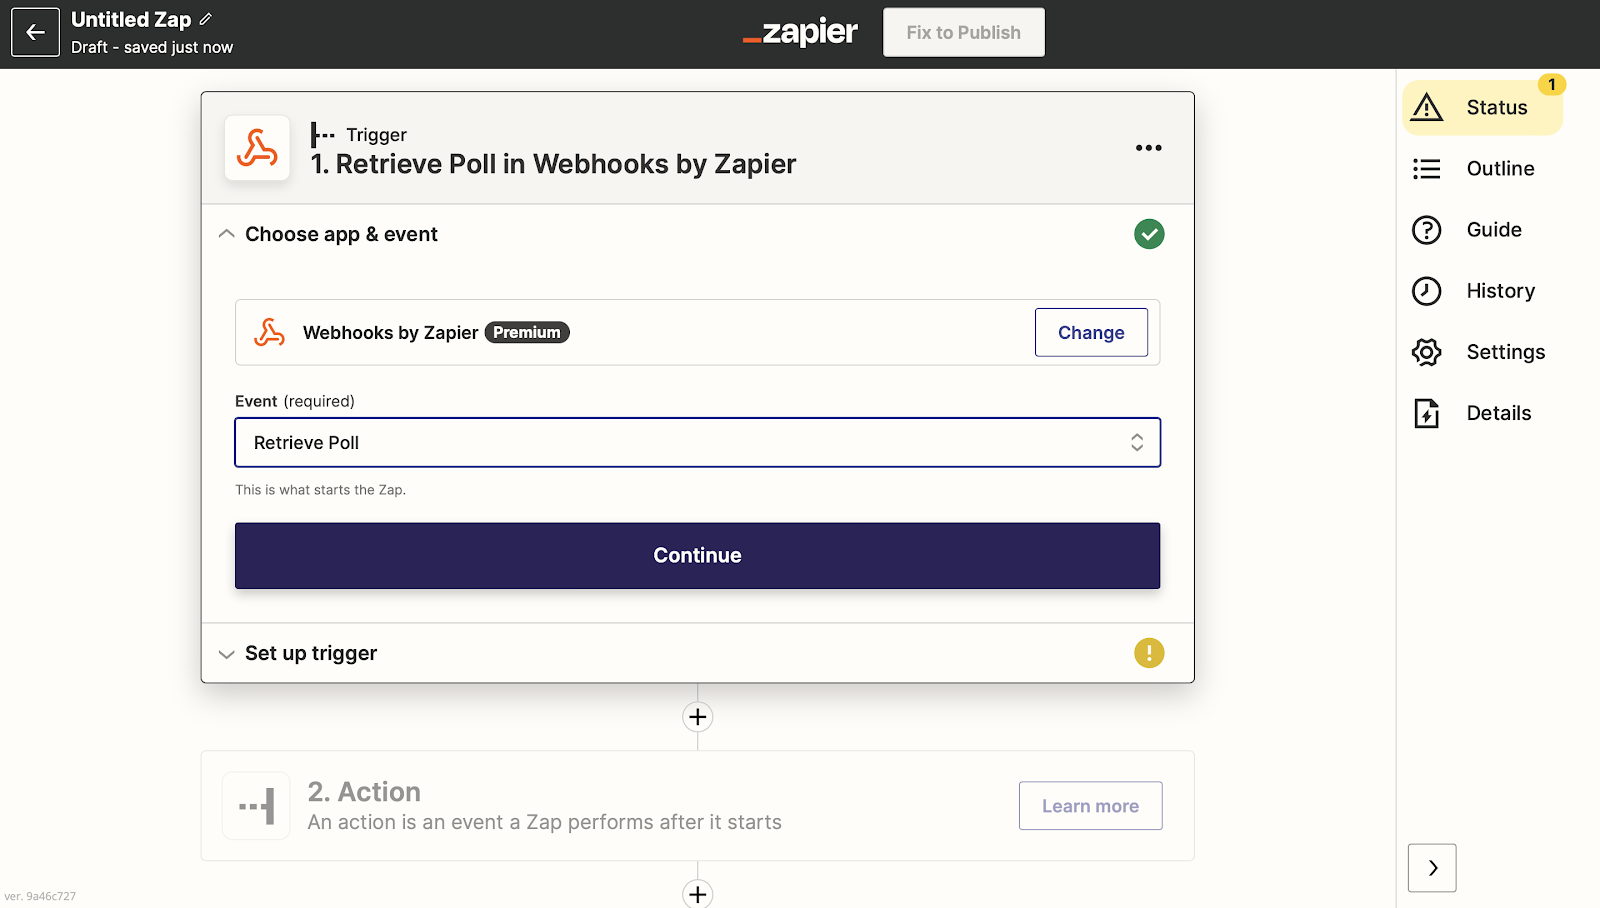
This will take you to the Webhooks page. If you’re using the premium version of Zapier, you can use Webhooks by Zapier by clicking on the Webhooks by Zapier button. Otherwise, click the Event dropdown and choose the event that suits you.
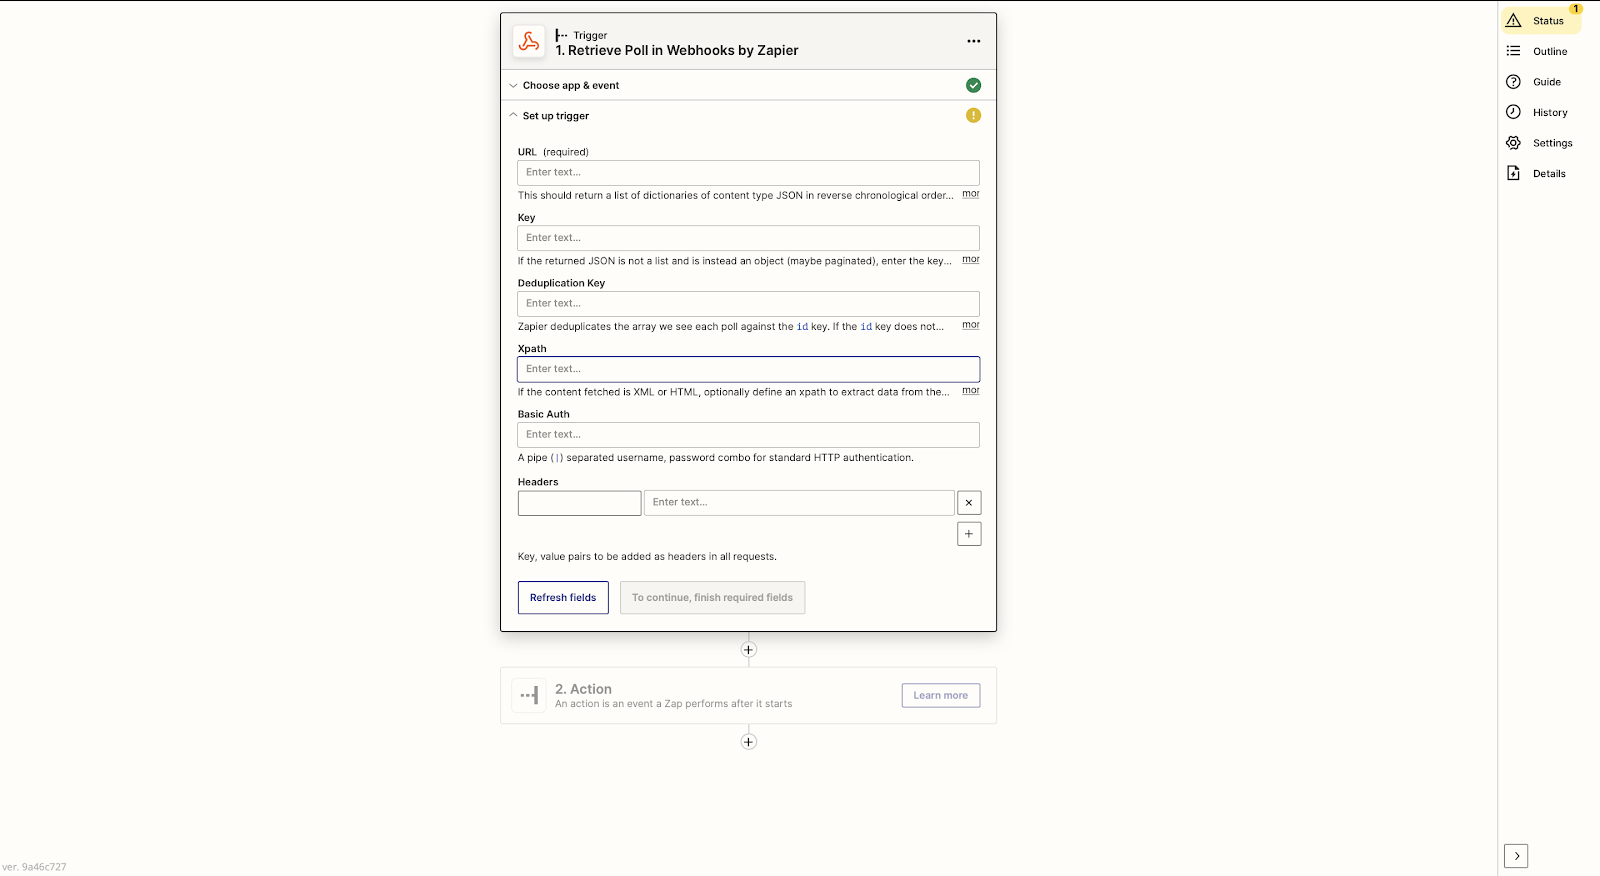
For the purpose of this tutorial, we chose the Retrieve poll event. This type of event checks your application regularly. And, if there’s any new information, it compares the item's unique ID to those it has already received.
|
|
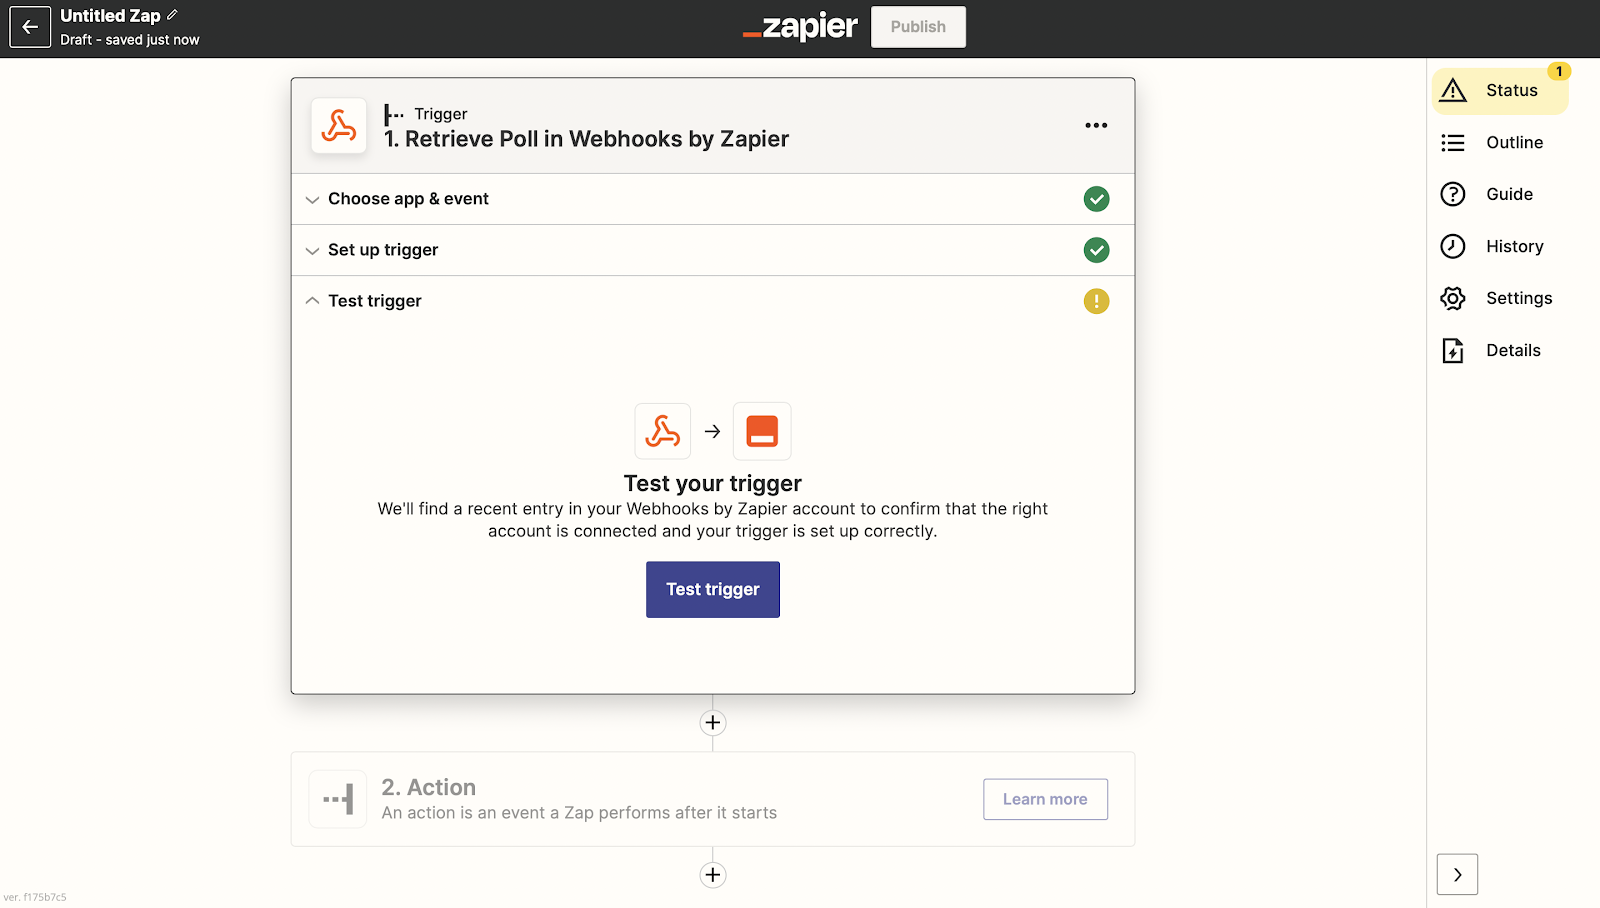
The next page will ask you to test the Webhook trigger. If the information you added is correct, you should see some data.
|
At this point, you can add actions to the Webhook trigger using one of the built-in apps in Zapier. When this is set, you’ll be given the URL for your Webhook and can set it up. Don’t forget to name your Zap and publish it when you’re ready. 💡
Is there a better way?
In this article, we explored workflow automation with Zapier and how to integrate Snowflake as a data source. While we can create a workflow integration with Zapier and Snowflake manually as shown in the tutorial above, it can take a lot of time to set up.
And, since the goal of automation is to speed up workflow execution as well as the overall efficiency of the program, it's a bit counterproductive if you have to spend time setting up an automated workflow. Plus, most integrations like Zapier evolved without consideration for other evolutions happening in parallel (like the accessibility and power of a data warehouse as a source of truth).
The plug-and-play nature of point-to-point platforms like Workato, Zapier, or Mulesoft often entices teams with quick fixes. But relying too heavily on these duct tape solutions can quickly get messy. Fully integrating point-to-point solutions requires exponentially more connections as your stack grows, adding more complexity to your tools and increasing your costs.
Tools like Census reverse ETL provide a faster and more efficient way to create Zapier 👉 Snowflake integrations. So, instead of a messy, spaghetti pile of point-to-point integrations, you can use reverse ETL to architect your data infrastructure as a series of orderly spokes around your central hub (data warehouse).
To learn more about Census and how to quickly incorporate source and destination integrations with web applications of our choice, request a demo to get started!